.png?width=800&height=418&name=Untitled%20design%20(14).png)
If you’re interested in having your cabinets painted and glazed, you’ve come to the right place. Glazing cabinets are one of the many finishes that looks stunning and will prove durability when done with the right process.
At Brush & Roll Painting in Omaha, NE, we take pride in our thorough cabinet refinishing prep work process and the high-quality products that make cabinets smooth and durable. We know with our 25+ years of experience that our thorough process sets us apart from our competitors.
Besides excellent communication and responsible workers who are proud to work in your home, this article will tell you what you can expect from the Brush & Roll Painting cabinet refinishing process of applying a solid color and a glaze.
By reading this article, you will be aware of our process for glazing cabinets, we hope this will help you be one step closer to knowing how you would like your cabinets to be refinished.
Starting a Cabinet Painting Project
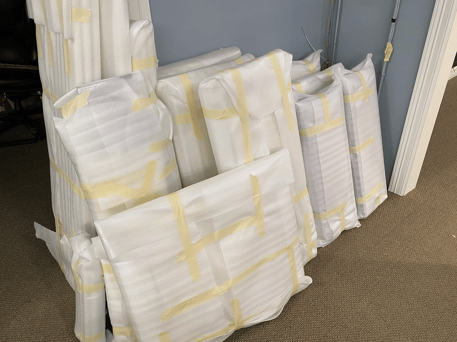 Upon entering homes for cabinet refinishing projects, our first task is to remove all of the cabinet doors and drawer fronts. These are labeled both on the cabinet doors and the boxes and carefully packaged for transportation in our van to go to our shop.
Next, we tape down paper and plastic to protect anything that does not need to be painted; walls, floors, countertops, and tile. We will also move any appliances out of the way if it’s not already done.
We can then begin our prep work process on the cabinet boxes.
Prep Work For Painting Cabinets
Having a solid foundation is crucial. It’s like building a house, applying primer and foundation for makeup, a base coat for manicures, or laying sturdy building blocks as a child.
A lasting and durable cabinet refinishing job begins with extensive prep work. This is nearly 70% of the total work that we do.
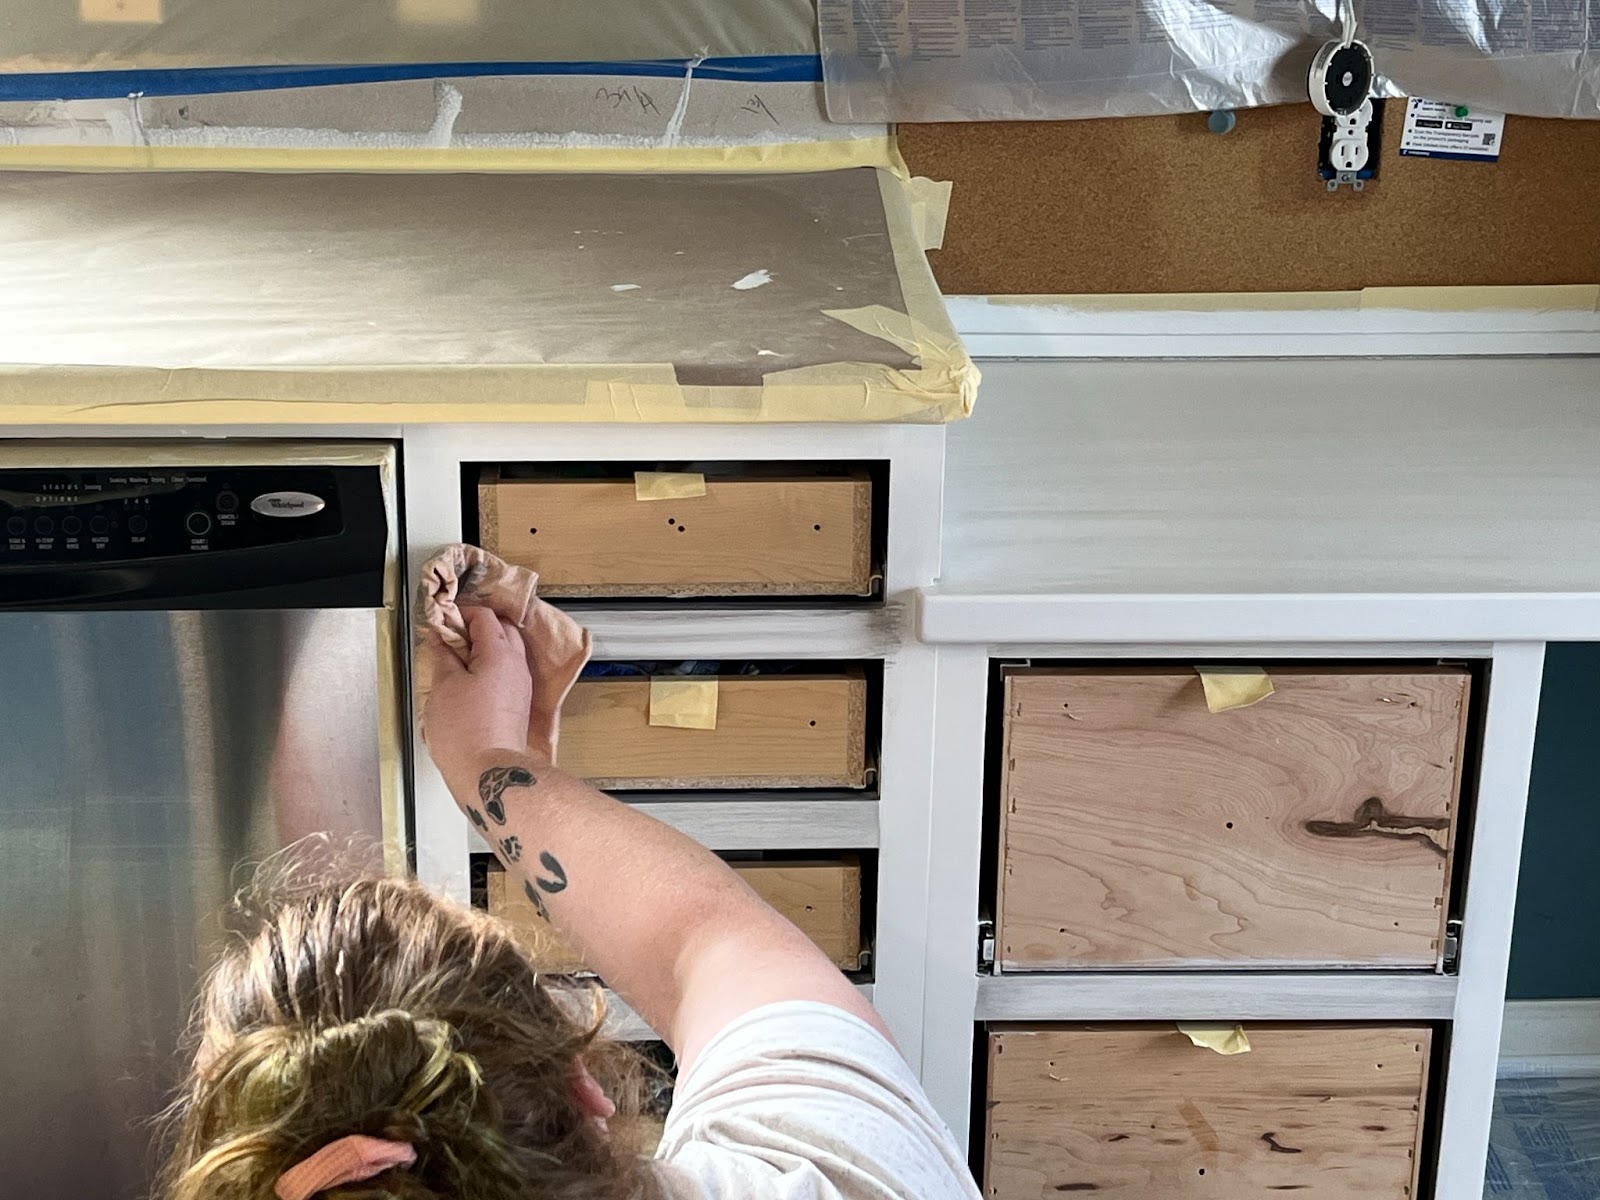
We start with a thorough cleaning to ensure we have a fresh start. When the wood is not thoroughly clean, it makes applying products more difficult down the line.
We will then sand the cabinet boxes for smoothness and to ensure the proper adhesion for the primer. The same is being done at our shop for your cabinet doors & drawer fronts.

Protective Layers on Cabinets with High-Quality Products
After thorough prep work, products can begin to be applied. Like the walls of a house or coats of nail polish, every layer of a product should be durable.
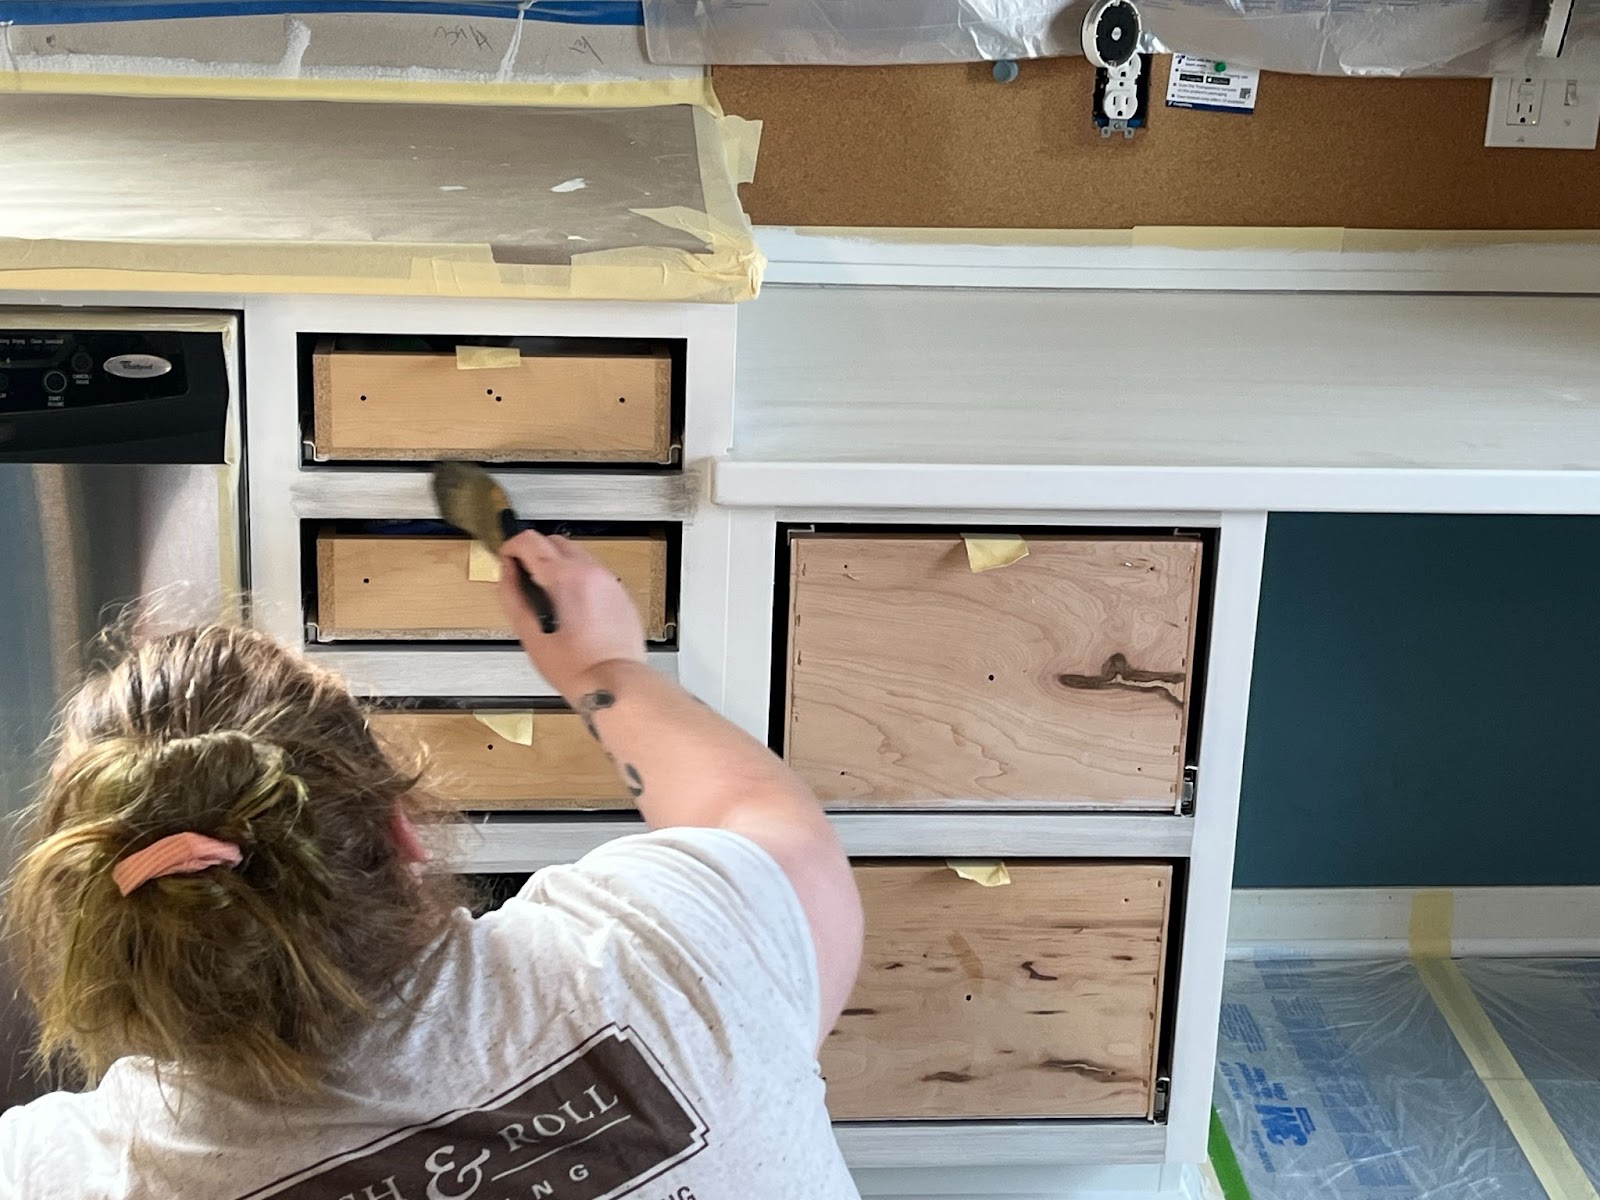
In the home, primer and paint (a 2K poly and pigment mixture) are applied to the cabinet boxes by brushing.
In the shop, we have a more extensive process for the cabinet doors and drawers, ensuring precision and detail to the front and the back of the cabinet doors and drawers. Rest assured, the products, materials, and applications of the products in your home and at our shop are the same.
We begin with one coat of an isolante resurfacer or a bonding primer, a product we know is not commonly used in the business due to its high quality. This product is chemical and abrasion resistant. It creates the perfect layer between the clean original cabinet wood or previous stain and durable layers of primers and a 2K polyurethane mixture.
After the coat of the resurfacer, 2 to 3 coats of Milesi’s stain-blocking primer are applied. This further ensures durability and adhesion to the final top layers to block any stains that threaten the surface. These coats also help cover up the previous stain, no matter the shade.
At Brush & Roll Painting, our thorough process includes sanding between every layer. This gives the next layer proper adhesion to the previous one with a smooth surface.
We use 180, 220, or 320 grits while sanding. 180 provides rougher sand on tough surfaces. 220 is about an average sand. 320 is light sand, providing a smooth surface with minimal work.
2K Polys for Glazed Cabinets
-1.png?width=444&height=372&name=Untitled%20design%20(2)-1.png) We have found our number one cabinet refinishing product to be Milesi. Milesi is a 2K polyurethane and can be clear or mixed with a solid pigment, to create durable layers on cabinet doors.
We have found our number one cabinet refinishing product to be Milesi. Milesi is a 2K polyurethane and can be clear or mixed with a solid pigment, to create durable layers on cabinet doors.
We do not use cabinet paint from the hardware store, woodwork, or acrylic paint on cabinets. From our research, trial and error, and years of experience in homes across the Omaha metro, we know cabinet paint is not a durable layer for cabinets.
These products tend to get soft quickly, especially in most touched areas like around the handles or knobs.
2K polys are only recommended for professionals, as it has to be mixed and used within a certain amount of time. This product is moisture, abrasion, and chemical resistant.
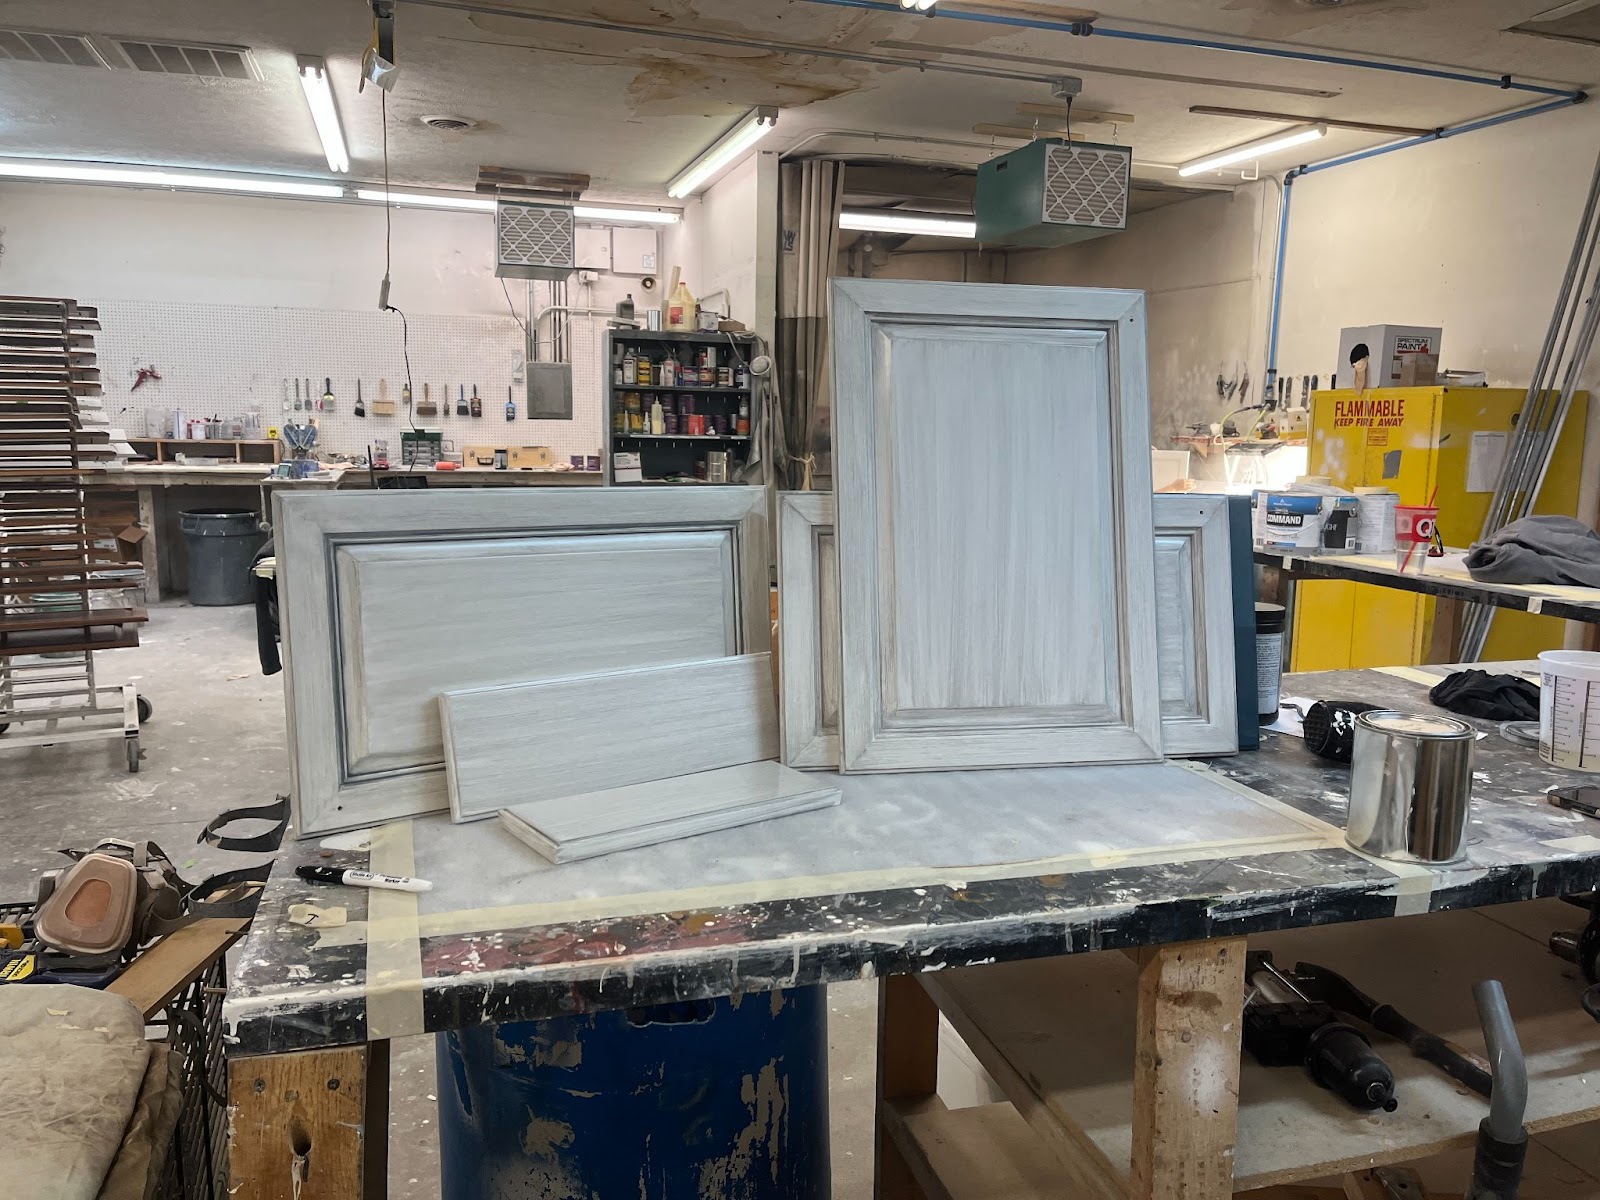
We apply 2-3 layers of the Milesi and pigment mixture. This acts as the base or main color of the cabinets under the glaze. These layers guarantee complete coverage; it also helps protect cabinets from chemicals and gives a furniture-like finish.
After it has dried, it is ready for another light, smooth sand in preparation for the glaze.
Glazing Finish on Cabinets
Glazing is much more than applying paint with a brush.
The glazing technique requires skill and can be a bit time-consuming. It can also bring out the perfectionist in some people. “Practice makes perfect” definitely aligns with applying the glaze.
Glazing calls for finishers to plan out where you're going to apply the glaze ahead of time because of the way the lines need to follow. For example, a whole cabinet door face or frame can not be painted at once. It will need to be painted in sections; on each side, each side of the outside profile, and the panels individually.
Glazing is done on cabinet doors, drawers, and the cabinet boxes or frames.
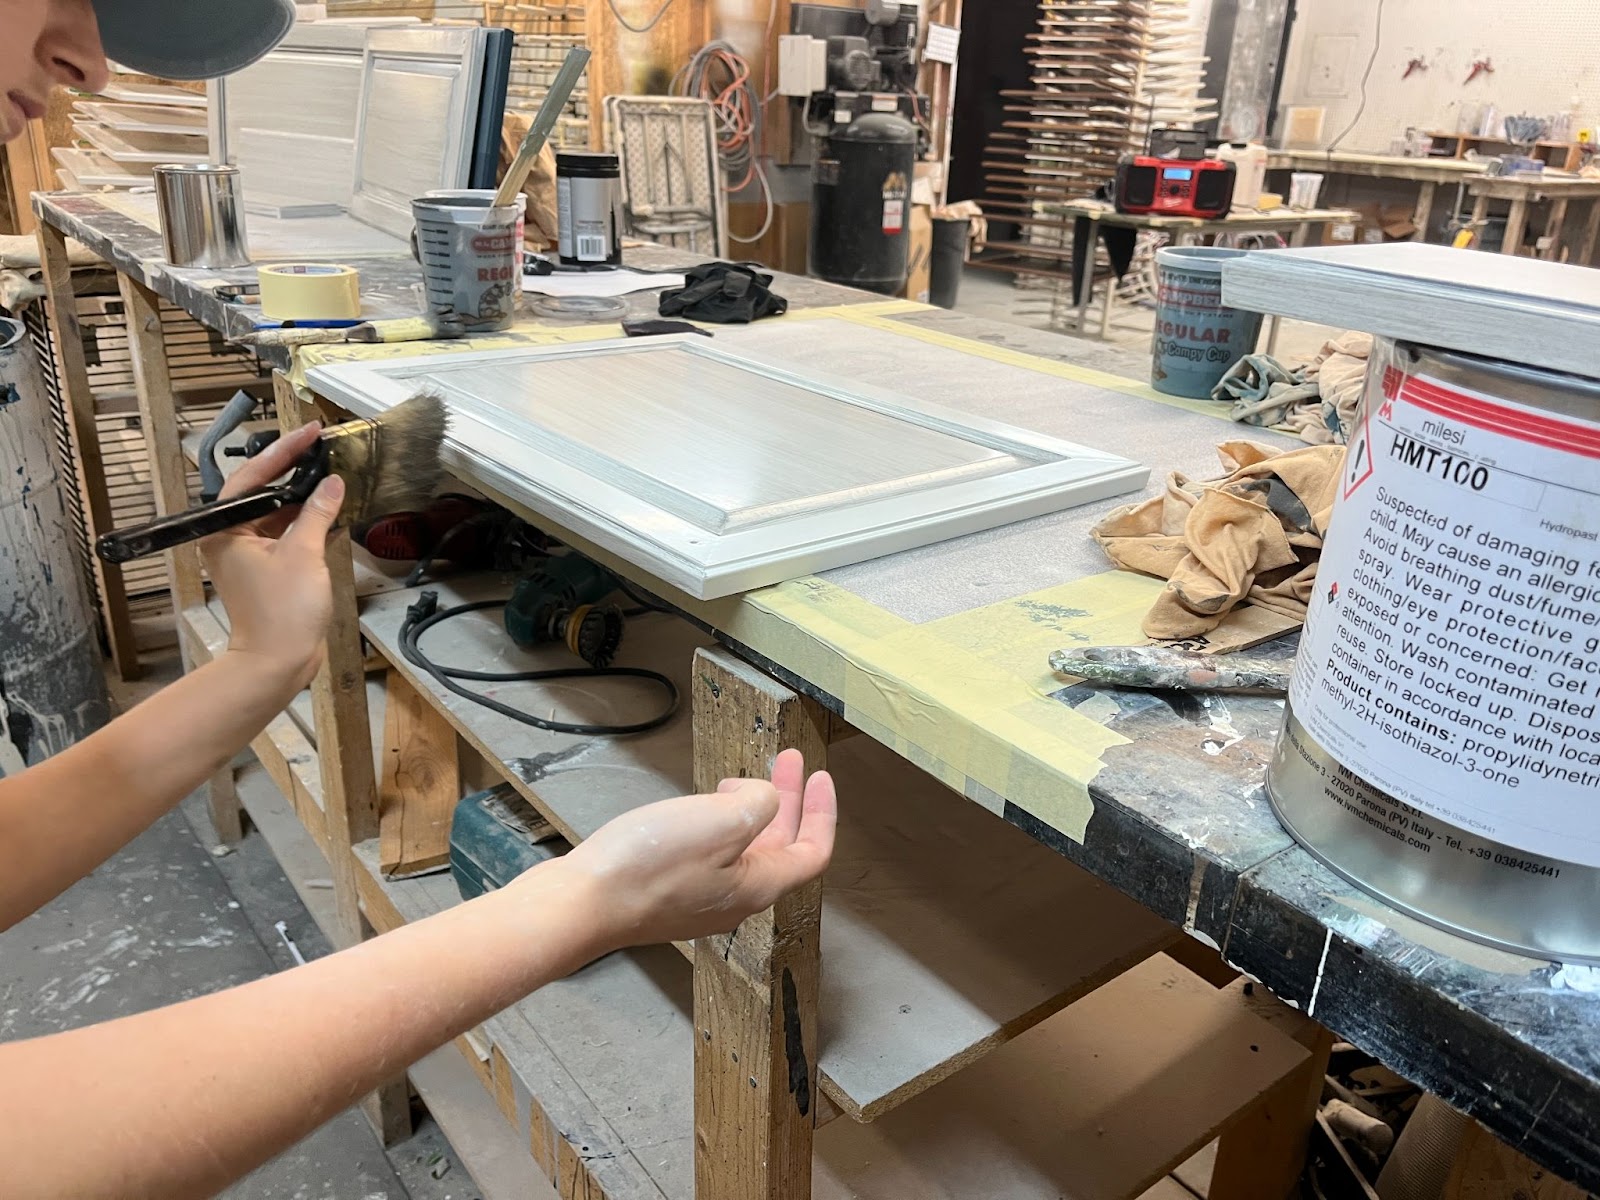
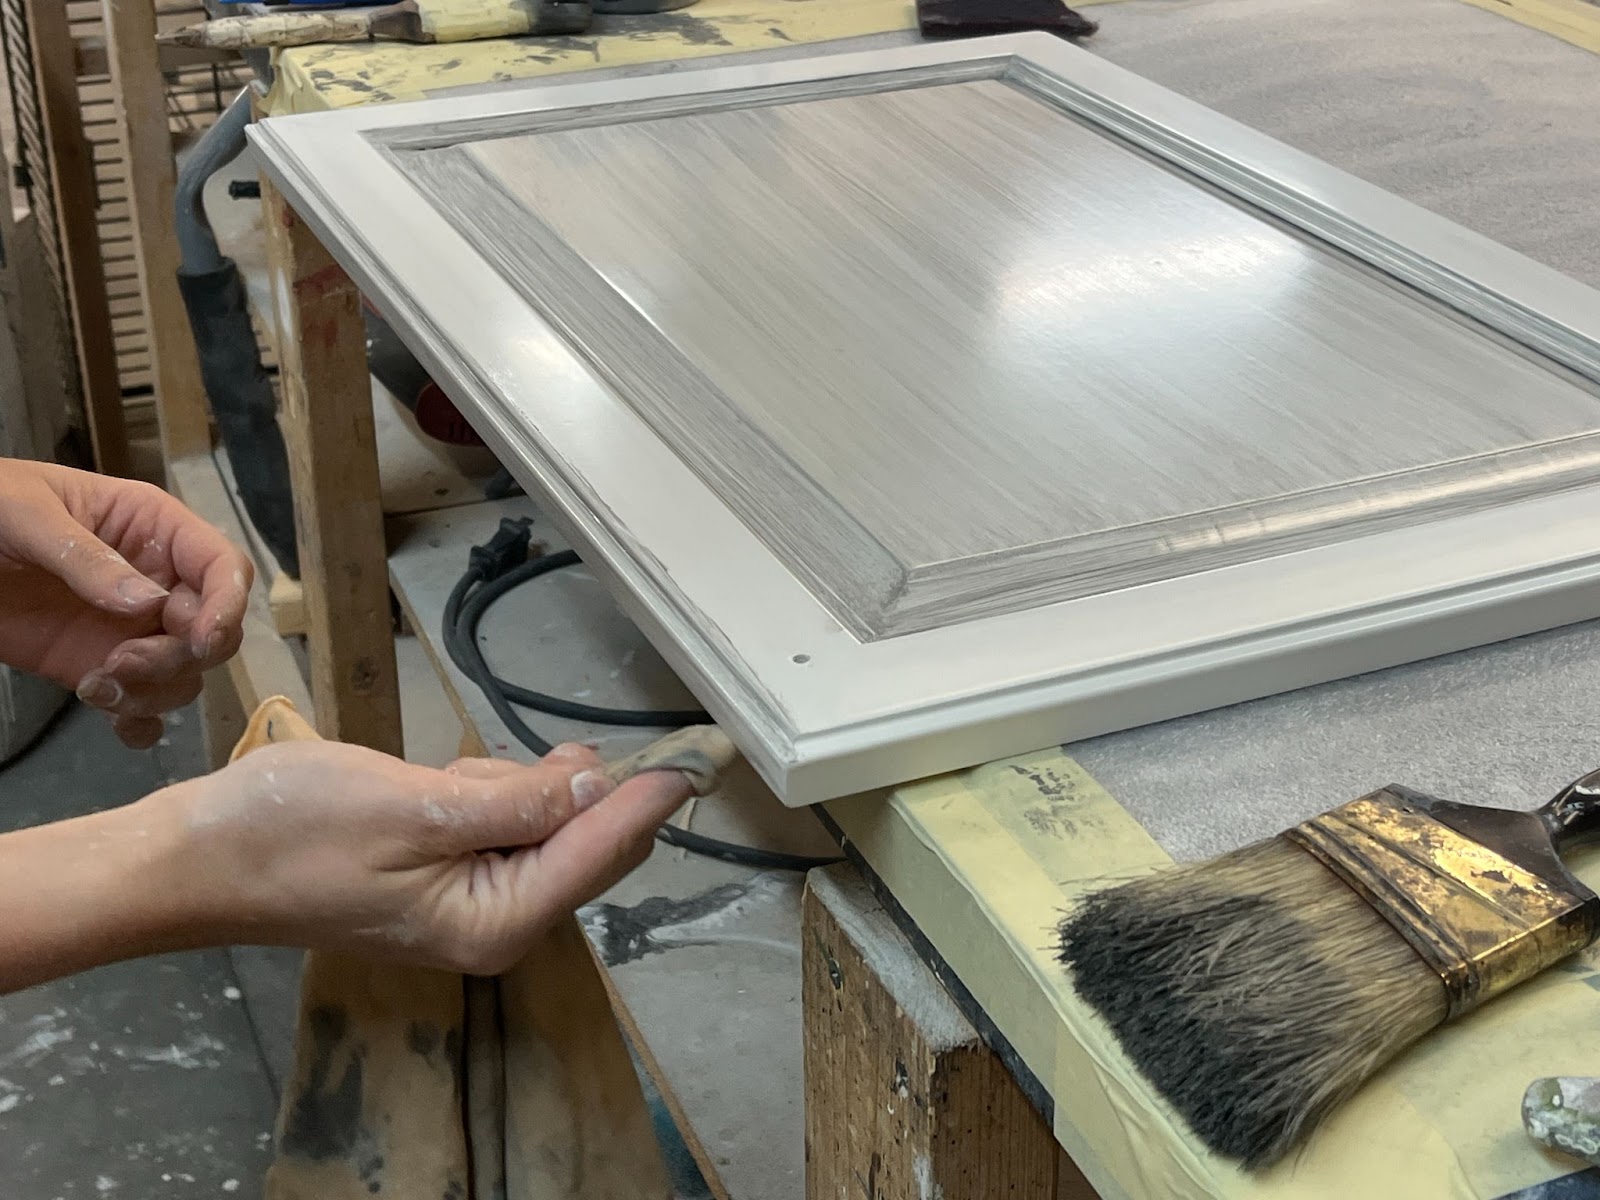
To apply glaze, finishers first put the paint/water mixture with a cabinet brush on the surface in one direction. Then they take a damp rag and wipe the majority of the paint off, leaving the paint to lie into thinly brushed lines in the same direction.
Next, they take another brush and wipe and feather the glaze out for even and smooth coverage. This is where they can begin to see the results of the glaze and compare it to previous samples. They will ensure that the color and the final product look similar.
The finishers may brush some areas out further or lighten up dark spots with a buffer.
If they are not satisfied with the results of this stain, they can quickly wipe it off and redo the technique with a lighter or heavier hand to get the desired look.
Lastly, they will use another rag to clean up any access paint that has dripped or was brushed on other areas.
Finishers have to use caution when they are glazing while also moving at a faster pace so that they can still control the paint before it dries.

This is where larger surfaces can be difficult. Finishers need to ensure that the glaze looks smooth while matching the other glazed areas. If not, they will need to quickly wipe the paint off completely and start again.
On top of the glaze, a clear protective coating is applied. Though each layer of product is durable, glazes are applied reasonably thin, so a protective coating will prevent them from being harmed as much as possible.
Lastly, bumpers are installed on the cabinet doors to help ease natural wear and tear.
When all the doors and drawers are finished at our shop, they are carefully wrapped up one final time to be transported to your home.

At your home, the doors are installed back onto the cabinets with your old (or new) hardware. We will snap a quick picture and let you enjoy your glazed cabinet transformation!
9 Year Cabinet Painting Warranty
Every cabinet refinishing project of ours comes with a 9-year warranty. This warranty covers yearly hour-long touch-ups covering any product failure. We honor the time it takes to ensure your cabinets look great for as long as possible.
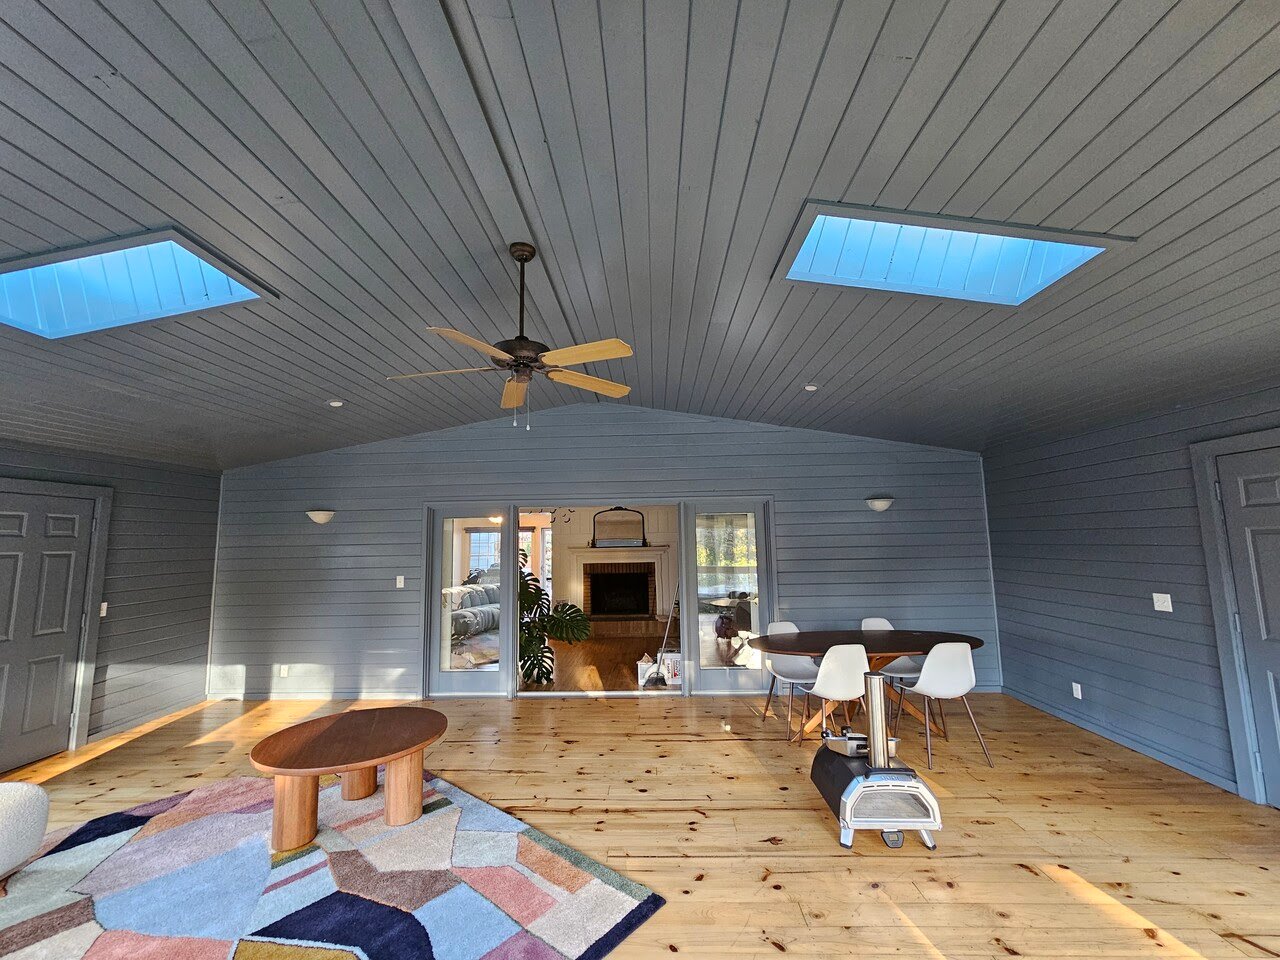
Glazing Your Cabinets
If you're considering giving your cabinets a fresh new look, glazing is a unique finish that can make your cabinets stand out. The art of glazing cabinets requires skill and precision, as each brush stroke and wipe of the glaze contributes to the final look. It's important that the finishers pay close attention to detail, ensuring that the glaze is applied evenly and smoothly. With protective coating for durability, your cabinets are guaranteed to withstand the test of time.
At Brush & Roll Painting, our process is different than most in our area. Our prep work process and the quality of the products we use, make us stand out.
To help you be more confident for each decision in your cabinet refinishing project, download your cabinet project checklist.


-May-22-2026-01-56-32-9736-PM.png?width=800&height=418&name=Blog%20Post%20Image%20Size%20(1)-May-22-2026-01-56-32-9736-PM.png)


-May-15-2026-04-54-24-9954-PM.png?width=800&height=418&name=Blog%20Post%20Image%20Size%20(1)-May-15-2026-04-54-24-9954-PM.png)
-Sep-20-2024-01-43-26-0356-PM.png?width=800&height=418&name=Blog%20Post%20Image%20Size%20(2)-Sep-20-2024-01-43-26-0356-PM.png)


