If you’re like most Omaha homeowners, your backyard playset has seen better days. Maybe it was a rich cedar tone when you first put it up. Now, it’s weathered gray, rough to the touch, and the wood's starting to crack. The kids might still use it, but it’s clear that the sun and snow have taken a toll. You might be wondering: “Should I restain it, or just replace the whole thing?” That’s a fair question, and you’re not alone.
At Brush & Roll Painting, we’ve helped homeowners in Omaha make these kinds of decisions since 1996. We know what it takes to restore a playset properly. Many folks are surprised to learn that staining a playset is not just a weekend job—it takes real prep work, the right tools, and a good understanding of how exterior wood reacts to our Nebraska weather.
While we use professional equipment and processes every day, we also understand the homeowner's perspective. You want it done right, but you also want it to be worth your time and money.
This article will walk you through the full process of staining a wooden playset. We’ll show you what steps are involved, what to expect, and how to tell when it might make more sense to replace it entirely. Whether you're planning to tackle the job yourself or just want to understand what goes into it before hiring a painter, this guide will help you make an informed choice.
Does Your Playset Need to Be Stained or Replaced?
Before we go into the step-by-step process, it’s worth pausing to ask: is the playset still structurally sound? Staining can make a big visual difference, but it won’t fix wood that’s rotted through or joints that are dangerously loose. Walk around your playset and check for:
- Deep cracks or splintering in the posts or steps
- Wood that’s soft to the touch (a sign of rot)
- Rusted hardware or loose bolts that won’t tighten
- Broken ladder rungs or swing set attachments
- Wobbly movement when in use
If any of these are a concern, you may want to talk to a contractor about replacement instead of refinishing. Sometimes, starting fresh is the safer and more cost-effective route.

The Step-by-Step Process to Stain a Playset Properly
If your playset is still in good shape structurally, staining can help protect the wood and keep it looking great for years. Here’s what the process typically looks like when done professionally:
1. Cleaning the Wood
Stain won’t stick to dirt, mildew, or old residue. Cleaning is always the first step. This usually means:
- Power washing the entire surface at a low pressure
- Using a wood-safe cleaner to lift out dirt, mold, or algae
- Letting the wood dry for at least 24 hours before moving forward
You might think the power wash alone is enough, but most playsets need more than water to get truly clean. A professional cleaner designed for exterior wood helps open up the grain so it can absorb stain evenly.
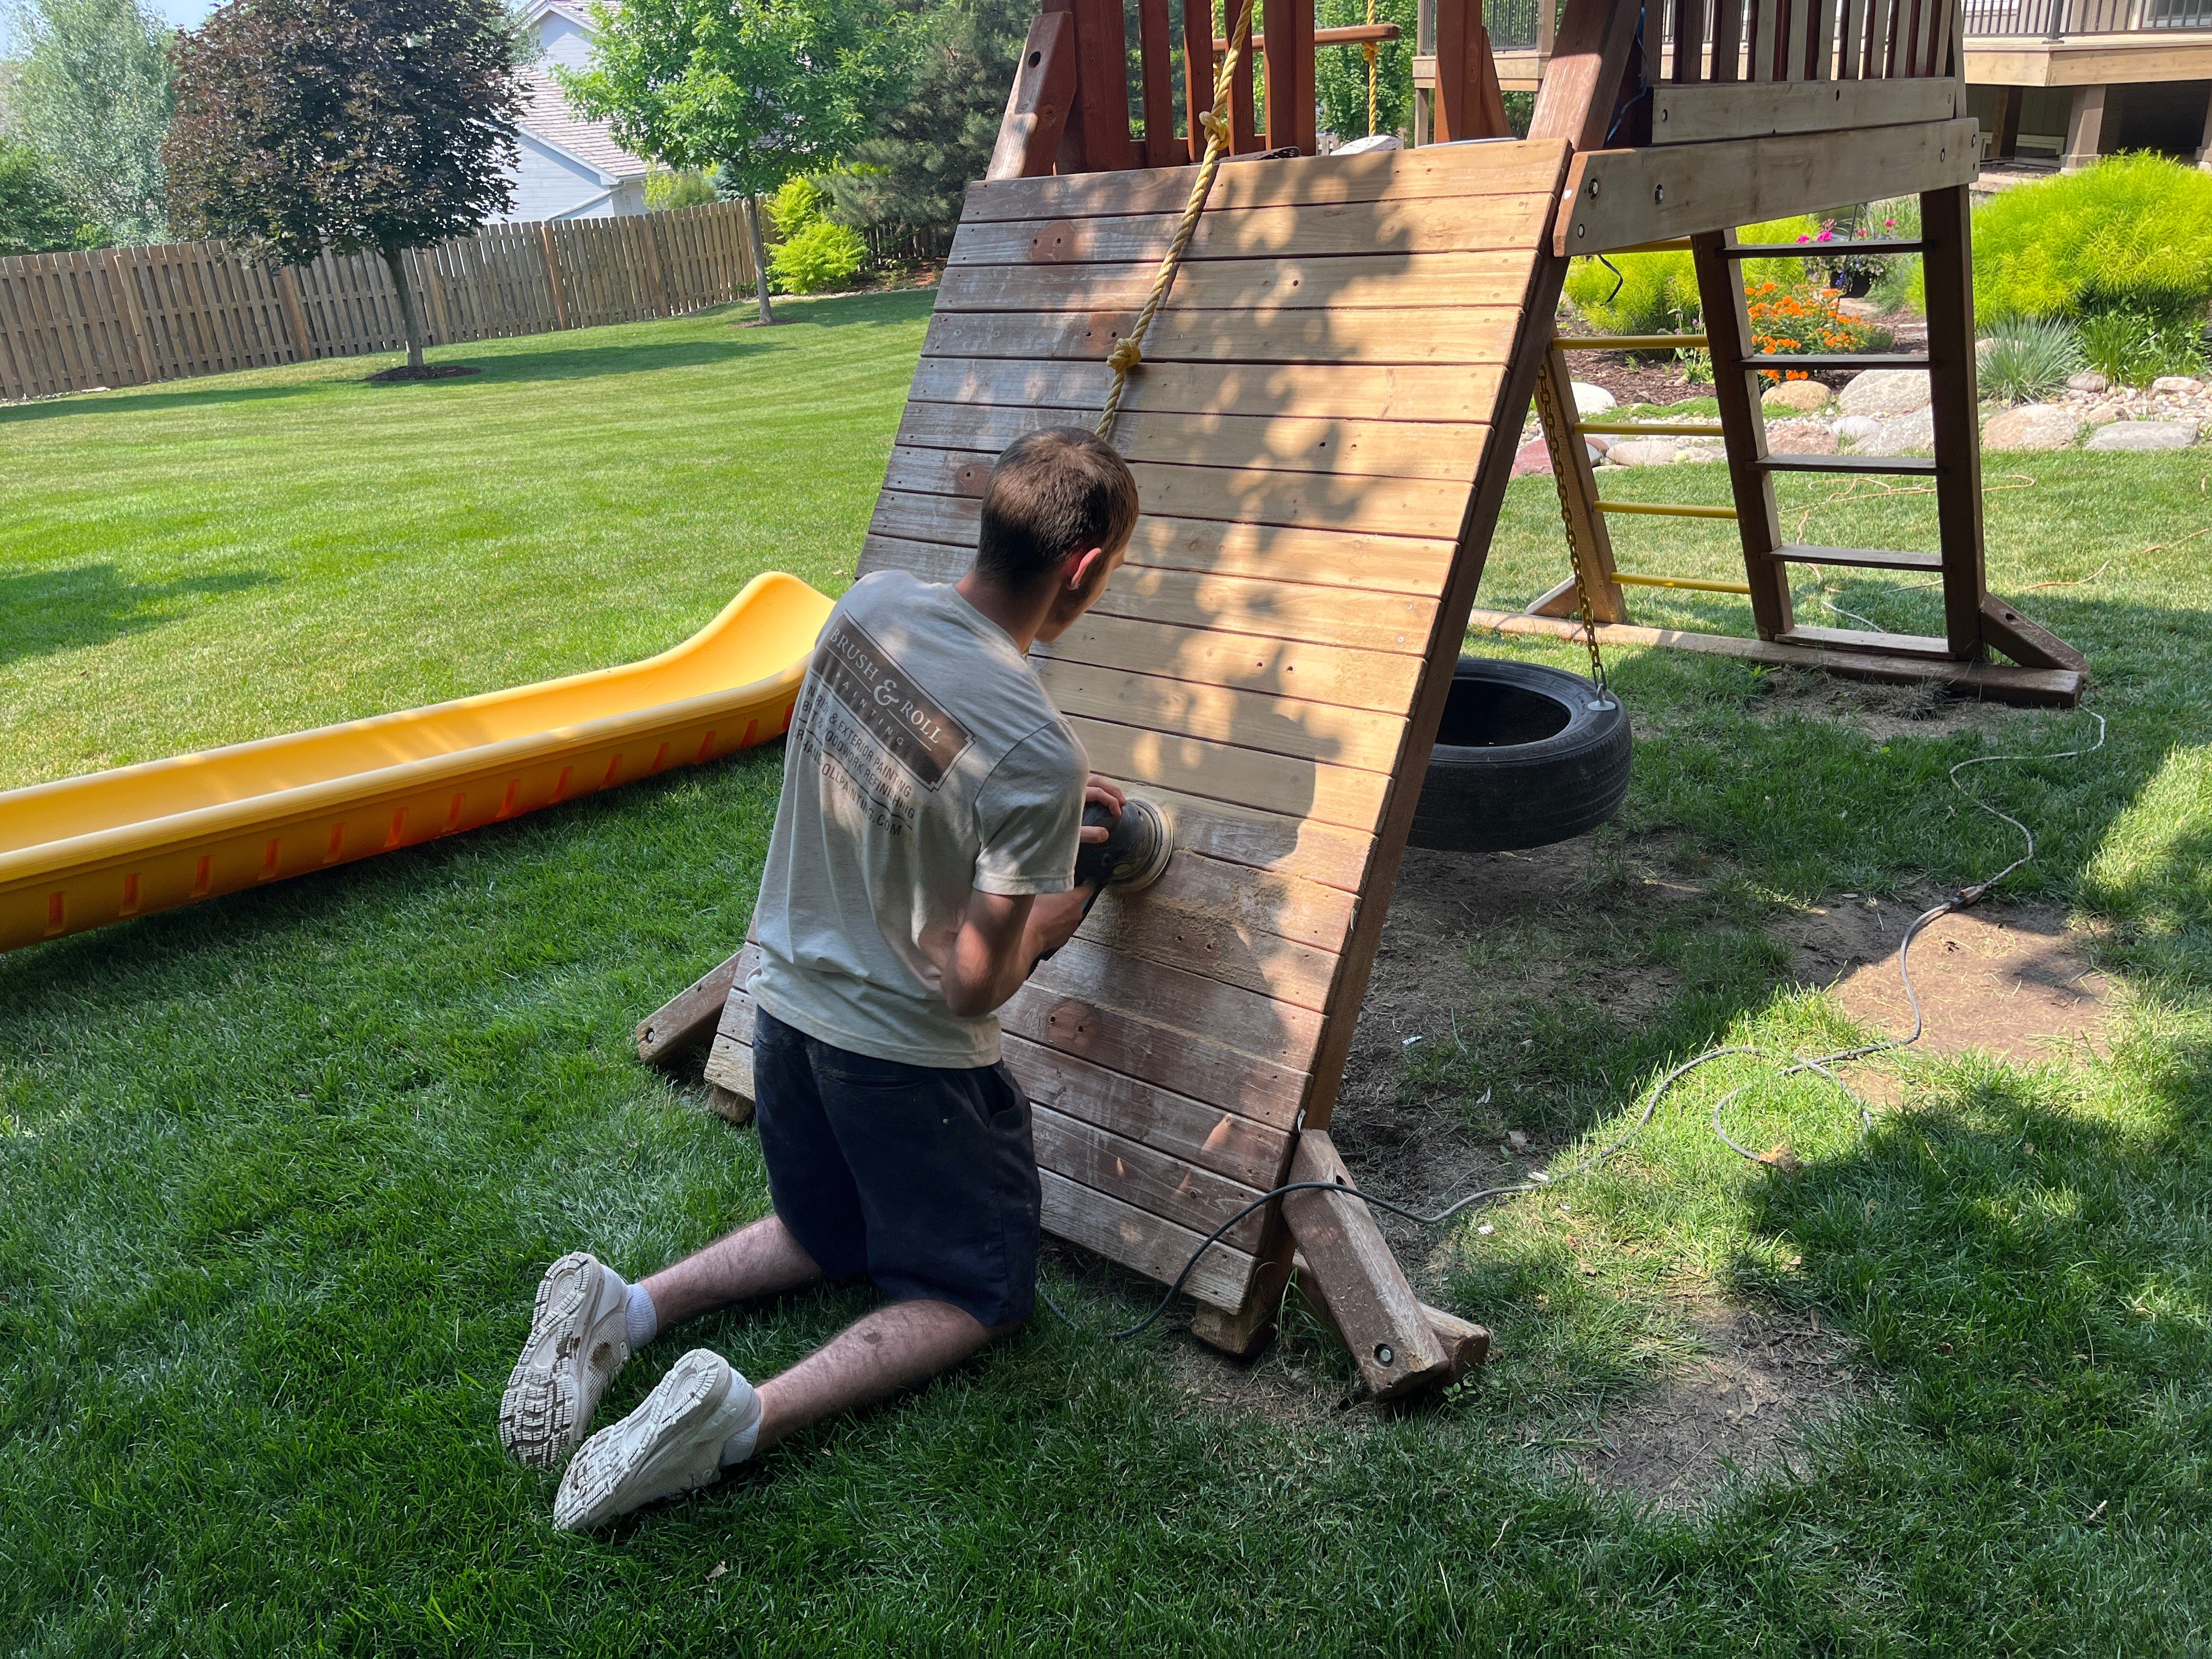
2. Sanding for a Smooth, Safe Surface
After cleaning, the wood fibers tend to rise, leaving the surface rough. Sanding solves this and serves a few other purposes:
- It smooths out splinters and rough patches, making it safer for kids
- It removes any leftover finish or graying from the wood
- It helps the new stain absorb evenly
We typically use a combination of orbital sanders for large areas and hand sanding for tighter corners. If you skip this step, the final result might look blotchy or peel quickly.
3. Repairing Loose Screws and Filling Nail Holes
Over time, screws and nails can pull out or create open gaps in the wood. Before staining, we check all the fasteners:
- Tighten or replace rusted bolts and screws
- Fill larger holes or splits with exterior-grade wood filler
- Replace any damaged pieces of wood or support boards
These small repairs help extend the life of the playset and make sure it holds up through more seasons of hard use.

4. Choosing the Right Stain
There are two main types of exterior stain: semi-transparent and solid color.
- Semi-transparent stain shows more of the wood grain and natural beauty. It’s popular for cedar and redwood playsets.
- Solid color stain acts more like a paint, covering the grain but offering the most protection and UV resistance.
The right choice depends on the look you want and the condition of your wood. Solid color stain is usually the better option for older wood that has uneven coloring or patches.
5. Applying the Stain (Spray and Back Brush)
This is where the real difference in results comes from—how the stain is applied. We always recommend:
- Spraying for fast, even coverage, especially on hard-to-reach areas
- Back brushing right after spraying to push the stain into the wood grain and avoid drips or lap marks
Back brushing might sound like extra work, but it’s what makes the finish last longer and look better. It’s the same method we use for fences and decks—because it works.
6. Dry Time and Final Walkthrough
Once staining is complete, it needs time to dry. Most stains require 24 to 48 hours before the playset is ready for use. Some things to remember:
- Don’t touch or use the equipment during this time
- Rain or heavy moisture can delay dry time
- Once it’s dry, inspect the finish for any missed spots
If you notice anything that looks too light or uneven, it might need a second coat in some areas. Usually, one coat is enough if it was applied properly, but every project is different.

Is Staining Worth It, or Should You Just Replace the Playset?
We get asked this a lot. Here’s a general rule of thumb:
- If your playset is under 10 years old, structurally sound, and just faded, staining is probably worth it.
- If the frame is wobbly, the hardware is failing, or the wood is splitting and rotting, replacement might be the better long-term option.

Playset Staining in Omaha: What to Expect
If you're hiring a painter in Omaha to do this work, here’s what you should ask during your quote process:
- What prep work is included? Make sure sanding, cleaning, and repairs are part of the job.
- Do you spray and back brush? If they only spray, the stain won’t last as long.
- What kind of stain do you use? Look for high-quality exterior wood stains from reputable brands.
- How long will the job take? Expect anywhere from 3 to 5 days, depending on size and weather.
- Is cleanup included? They should leave your yard just as clean as they found it.
Staining a Wood Playset in Omaha, NE
Let’s go back to where we started. Your playset has weathered a few tough seasons, and it’s looking a little rough around the edges. Maybe you weren’t sure if it could be saved. But now you know exactly what goes into restoring it properly. From washing and sanding to spraying and back brushing, there’s a lot more to staining a playset than just slapping on a coat of color.
At Brush & Roll Painting, we’ve seen firsthand how the right prep work and product choices can bring wood back to life. We’ve served Omaha homeowners since 1996 and believe that the more you understand about a project, the better decisions you’ll make.
If you’re ready to give your playset a fresh start, click the button below to start the process and get a quote.

Not quite ready? No problem. We’ve put together a free Guide to Hiring a Painter to help you know what to ask, what to expect, and how to choose the right pro for the job. It’s a great resource whether you’re planning to stain a playset, refinish a deck, or paint your home’s exterior.

Topics:


-May-22-2026-01-56-32-9736-PM.png?width=800&height=418&name=Blog%20Post%20Image%20Size%20(1)-May-22-2026-01-56-32-9736-PM.png)


-May-15-2026-04-54-24-9954-PM.png?width=800&height=418&name=Blog%20Post%20Image%20Size%20(1)-May-15-2026-04-54-24-9954-PM.png)
-Sep-20-2024-01-43-26-0356-PM.png?width=800&height=418&name=Blog%20Post%20Image%20Size%20(2)-Sep-20-2024-01-43-26-0356-PM.png)


