-Mar-29-2024-06-31-06-0100-PM.png?width=800&height=418&name=Blog%20Post%20Image%20Size%20(1)-Mar-29-2024-06-31-06-0100-PM.png)
Beginning a kitchen cabinet refinishing project might sound daunting. You may be thinking you have a lot to do to get your kitchen ready for the project. At Brush & Roll Painting, we understand the challenges homeowners face when embarking on a cabinet painting journey
With 25+ years of experience serving homeowners in and around Omaha, Brush & Roll Painting has established itself as a trusted authority in residential painting services. Our team of skilled professionals possesses the expertise and knowledge needed to guide you through every step of the cabinet painting process.
In this article, we'll walk you through the essential steps you need to take to prepare your kitchen for a cabinet painting project with Brush & Roll Painting. Reading this article can help you feel more prepared for your upcoming project.
Clear Your Countertop Before Cabinet Painting
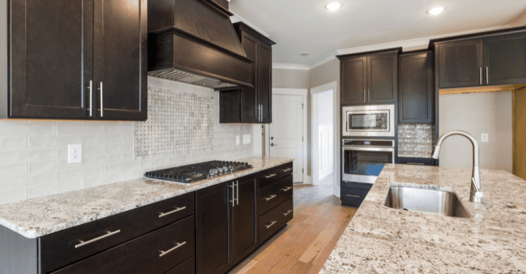
First, you’ll need to take everything off the countertops and on top of the upper cabinets. Any valuables must be stored away in a different place to be protected.
You can leave everything in your cabinets unless we are painting inside of them. Typically, homeowners only request that we paint the inside of cabinets when they will be showing through a glass or specialty door.
If we are taking your full drawers, you will need to take everything out. If we are just taking the drawer fronts, you can leave everything inside as is.

Moving Appliances Before Cabinet Painting

If you have a side panel(s) next to your refrigerator, it will need to be moved to be painted.
If you are unable to move it before the painters' arrival, the painters can help you move it but require you to be there. This is because you should see if there is any damage before the time of moving the fridge.
The rest of the appliances in your kitchen are protected by tape, paper, and plastic. If you wish to protect the appliances further, you may move them to a different location.
Cabinet Painting Project Timeline
.jpg?width=631&height=316&name=Horizontal%20image%20Size%20(11).jpg)
At Brush & Roll Painting, we will be in your home to paint the cabinet boxes anywhere from 5-10 business days. We will have the cabinet doors and drawers at our shop for 10-15 business days to make sure everything looks fantastic for you.
After we are finished with your cabinet boxes, you can move everything back to its original location.
At the beginning and end of the project, the crew lead assigned to your job will take a look at your space with you. At the beginning of the project, they go over the scope of work and ask any questions they may have about the final details.
At the end of the project, they are going over the completed work with you to ensure that you are happy with everything.
After the doors and drawers are completed, we will schedule a delivery and installation day with you. This usually takes one day but could be two days for a larger kitchen.
Feeling apprehensive about tackling such a significant home improvement project is understandable. But armed with this article, you've learned the essential steps needed to streamline the preparation process.
At Brush & Roll Painting, our team of skilled professionals is here to guide you every step of the way, from selecting the perfect paint colors to executing flawless painting techniques.
To help you stay confident through each phase of the project, like preparing your kitchen, download your cabinet project checklist.


-May-22-2026-01-56-32-9736-PM.png?width=800&height=418&name=Blog%20Post%20Image%20Size%20(1)-May-22-2026-01-56-32-9736-PM.png)


-May-15-2026-04-54-24-9954-PM.png?width=800&height=418&name=Blog%20Post%20Image%20Size%20(1)-May-15-2026-04-54-24-9954-PM.png)
-Sep-20-2024-01-43-26-0356-PM.png?width=800&height=418&name=Blog%20Post%20Image%20Size%20(2)-Sep-20-2024-01-43-26-0356-PM.png)


