If you’ve ever driven through a neighborhood and noticed splotchy siding, paint streaks on windows, or what looks like paint misted on plants and bushes, you’ve seen the aftermath of a poorly done spray job on a home’s exterior. It’s frustrating to spend thousands of dollars on exterior home painting only to end up with uneven coverage, bubbling paint, or worse, overspray that damages nearby surfaces. As a homeowner, you want your house to look fresh and well cared for, not like it was rushed or done sloppily.
Painting a house exterior can look beautiful and can help protect your home when it’s done right, but it can just as easily go wrong when corners are cut.
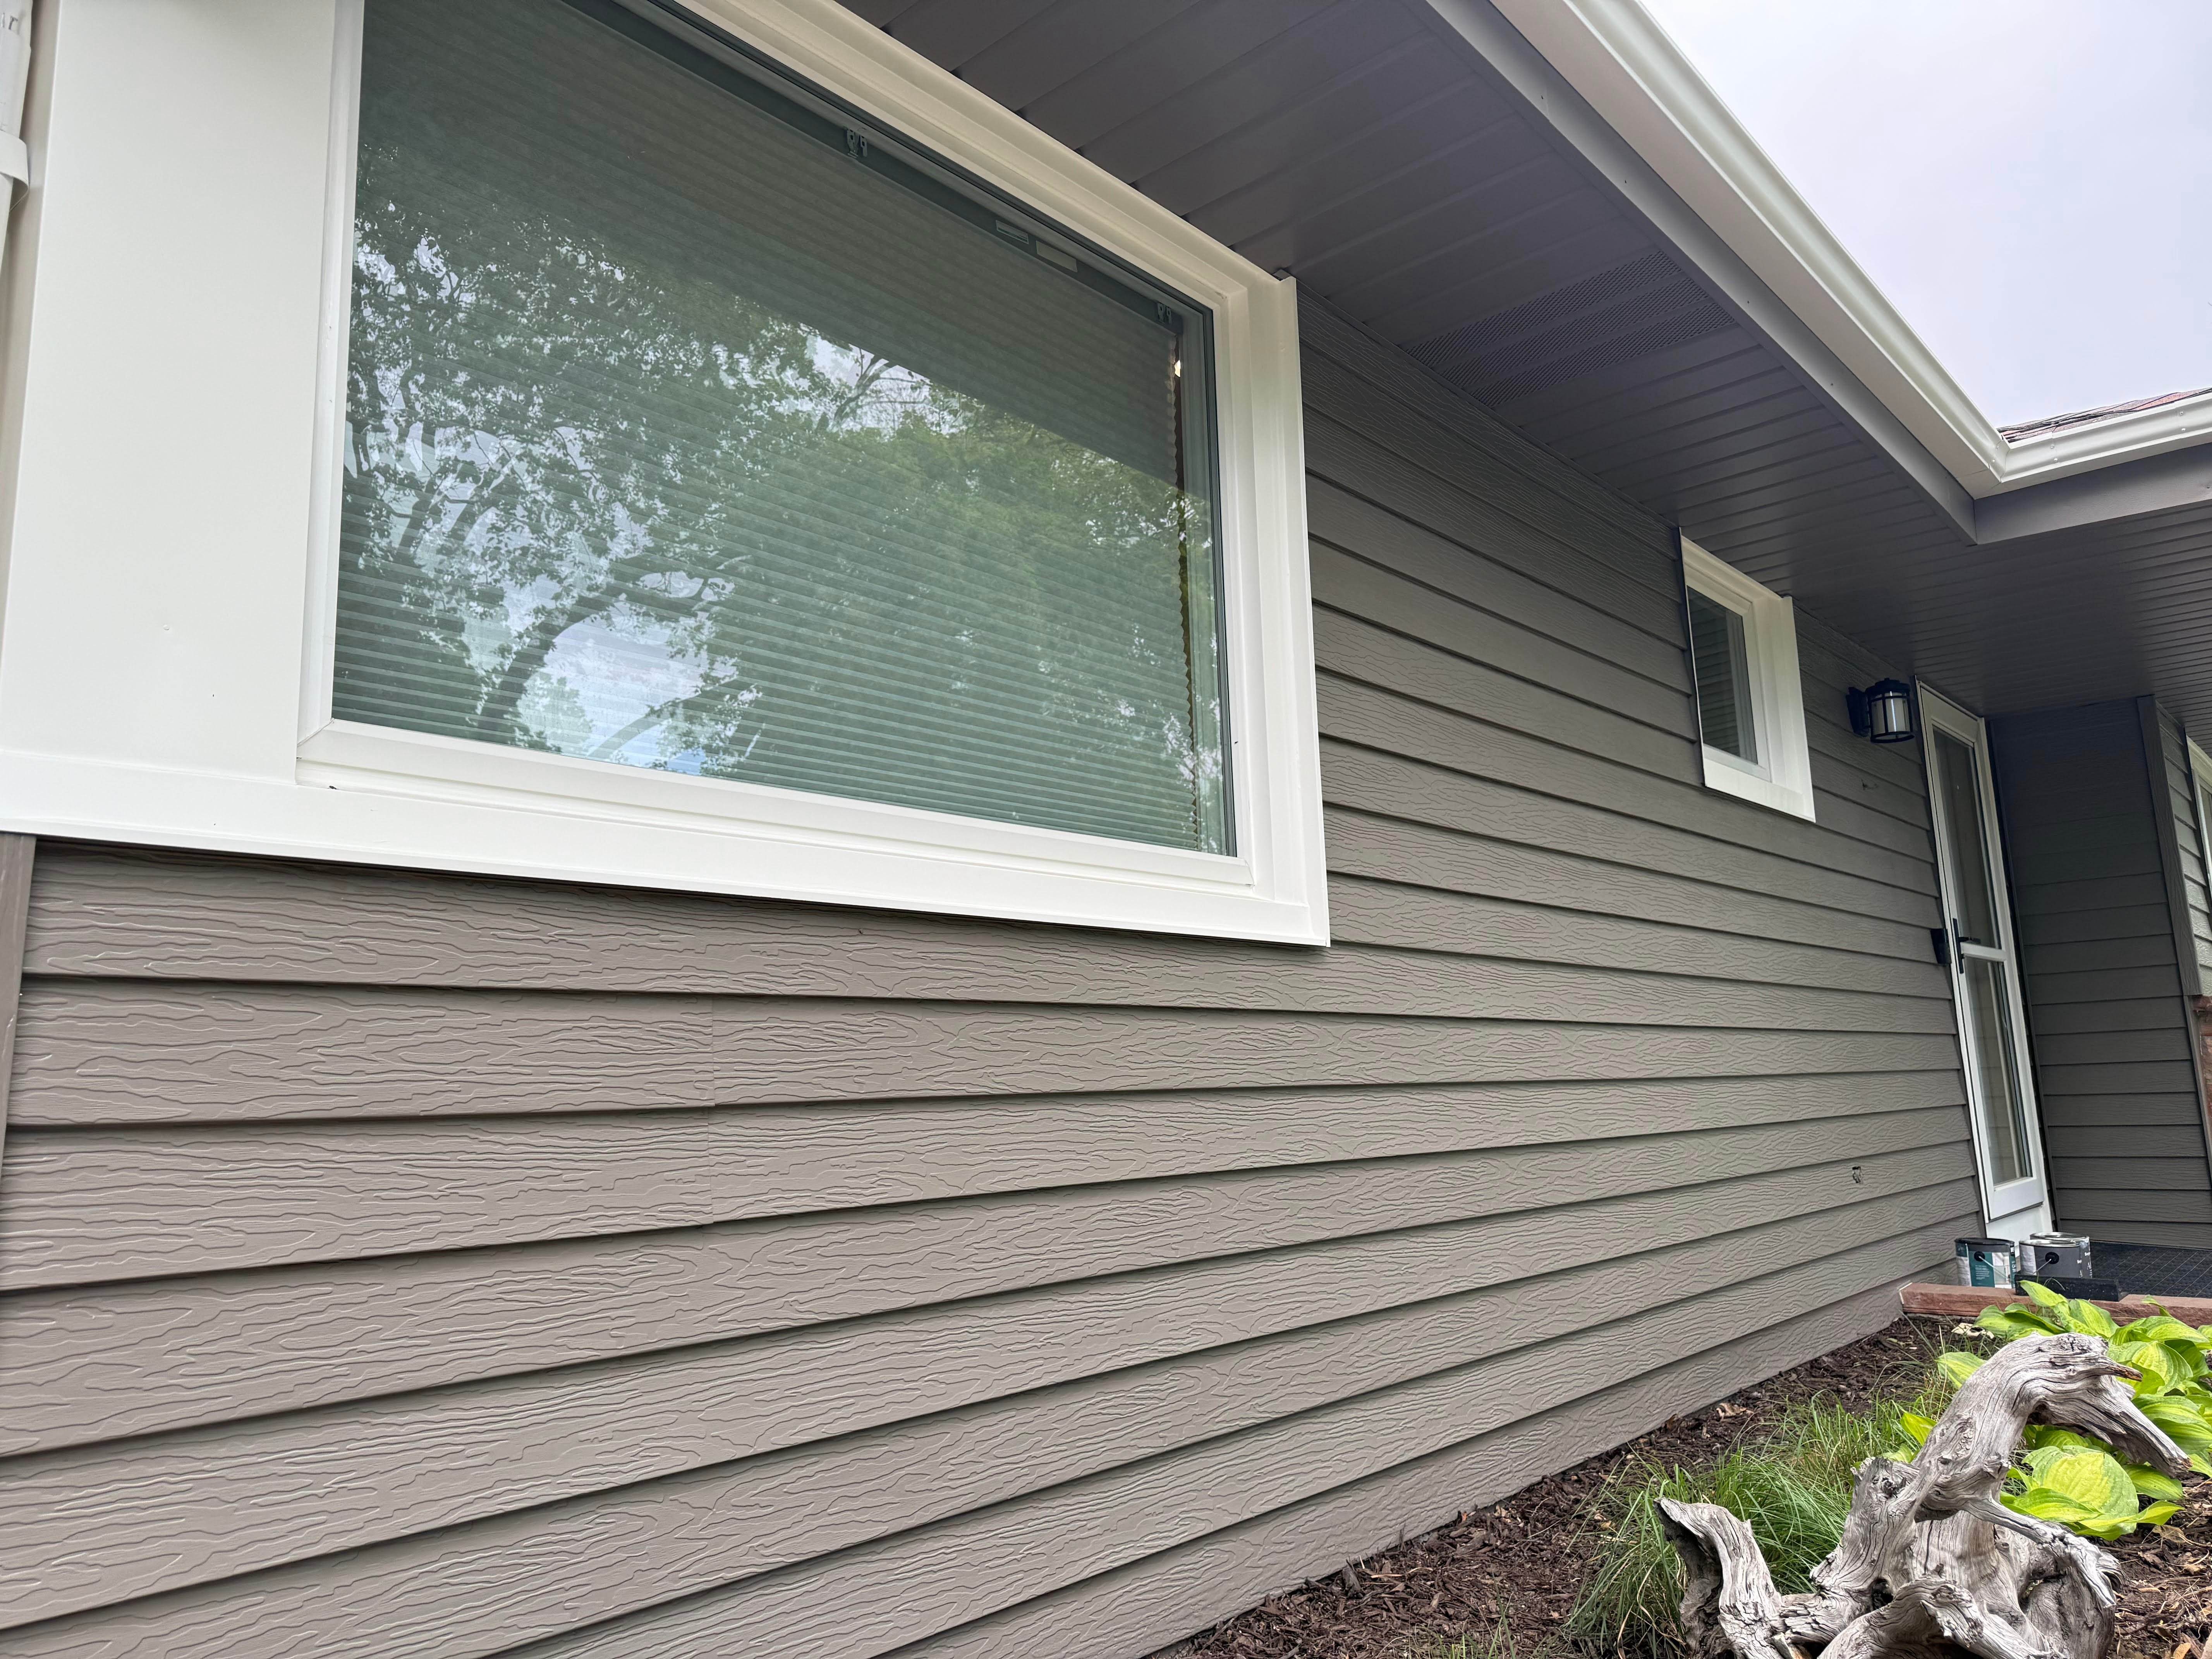
At Brush & Roll Painting, we’ve been painting homes across Omaha since 1996. We’ve seen the good, the bad, and the ugly when it comes to exterior painting in Omaha, especially when it involves using a sprayer. Our team has handled all types of exterior siding, weather conditions, and application methods.
We use high-quality paints and finishes, like Benjamin Moore’s Aura, and we take our prep work seriously because that’s what leads to a lasting finish. Our goal is to help you understand the right way to spray exterior paint, so whether you're hiring exterior painters in Omaha or just learning about the process, you know what to expect.
In this article, we’ll walk you through exactly how professional painters should spray the exterior of a house. We’ll break down how to avoid overspray, what tools help painters get even coverage, when back brushing matters, and how to ensure the correct thickness of paint is applied. If you’re wondering “how to spray paint the exterior of a house” or “how to spray paint the house exterior for long-lasting results,” you’ll leave this article with clear answers and peace of mind.
Why Paint Spraying a House Exterior Is Common & How It Can Go Wrong
Spraying is a popular method for exterior painting because it can cover large areas quickly and deliver a smooth, even finish when done correctly. But spraying is only as good as the preparation, technique, and follow-through.
Here are a few common problems when spraying isn’t done the right way:
- Overspray getting on windows, driveways, plants, or even cars
- Thin or uneven coverage that causes premature peeling
- Missed spots where the paint didn’t reach edges, corners, or textured surfaces
- Wasted paint from poor control or low-quality sprayers
If any of this sounds familiar, you’re not alone — many homeowners in Omaha have had bad experiences with exterior house painting. Let’s go over what professional exterior painters in Omaha should be doing to avoid these issues.
Step 1: Protecting the Surrounding Areas from Overspray
Overspray is one of the biggest risks when painting house exteriors with a sprayer. That fine mist of paint can travel further than most homeowners expect — even a light breeze can carry it onto your neighbor’s siding or your patio furniture.
Professional painters should always:
- Cover nearby windows, brick, stone, walkways, HVAC units, and plants with plastic or canvas drop cloths
- Use masking tape and paper to seal off trim, outlets, and fixtures
- Use wind barriers or shields when working in breezy conditions
- Avoid spraying on windy days whenever possible
Some painters will try to “spray fast” to avoid problems, but this usually leads to mistakes. The real solution is careful masking and taking the time to prep everything thoroughly.

Step 2: Using Extension Rods and Ladders Safely and Effectively
One of the benefits of paint spraying is being able to reach high areas without always needing a ladder, but that doesn’t mean ladders are out of the picture. On two-story homes, gables, or areas around rooflines, painters often need both ladders and spray extensions.
Here’s how pros handle it:
- Extension poles are attached to the sprayer gun to reach high sections safely
- Ladders are used with stabilizers to prevent slipping and protect gutters or siding
- Spotters or helpers may assist with repositioning ladders or holding them in place
- Work is done from the top down to minimize drips and ensure coverage
If a painter is stretching or leaning off a ladder awkwardly with a sprayer, that’s a red flag. The right equipment keeps things safe and helps avoid uneven application.
Step 3: Back Brushing — When and Why It Matters
You might think spraying does all the work, but sometimes it’s not enough. That’s where back brushing or back rolling comes in. This is when a painter goes over the freshly sprayed surface with a brush or roller to work the paint into the surface and make sure it adheres well.
This step is especially important if:
- The siding is rough, porous, or textured (like cedar, stucco, or older wood)
- You’re using a stain or a thinner product that needs deeper absorption
- The surface has been heavily weathered or dried out from sun exposure
In Omaha, we see a lot of homes with wood siding that soaks up paint. Back brushing helps that first coat soak in, and it also improves adhesion for the second coat. If a painter skips this step on an older or worn surface, the paint may peel or flake within a year or two.

Step 4: Applying the Correct Paint Thickness (Mil Thickness)
You can’t tell how much paint is on the wall just by looking at it. Professional painters use mil gauges to measure the wet and dry film thickness of paint to make sure the product is applied as the manufacturer intended. Too thin and it won’t hold up, too thick and it could sag or crack.
Here’s what goes into getting this right:
- Understanding the product’s technical data (most paints require a 4 to 6 mil wet application)
- Spraying in overlapping passes to avoid thin lines or streaks
- Avoiding over-application that can cause the paint to run, especially on vertical surfaces
- Using the right tip size and pressure settings on the sprayer for the type of paint
If your painter isn’t measuring or at least discussing mil thickness, they may not be following product guidelines. And that can lead to premature paint failure.

Step 5: Following a Consistent Pattern and Dry Time
The goal when spraying is not only even coverage but also consistency across the entire house. Professionals follow a clear plan:
- Work from left to right
- Spray in consistent, overlapping passes, usually about 50 percent overlap
- Paint one full wall or surface at a time before moving to the next
- Allow proper dry time between coats based on temperature, humidity, and sun exposure
In Omaha, the weather can change fast. One side of your house might be in full sun while another is in the shade. Dry times will vary, and painters should adjust accordingly to avoid blistering or bubbling.
Step 6: Inspecting the Finish and Doing a Final Touch-Up
Once the paint has dried, a professional should do a full walkthrough and touch up any missed spots, drips, or thin patches. Some areas — like corners, soffits, or near outlets are harder to spray cleanly and may need to be cut in with a brush.
A good painter will:
- Check their work in different lighting
- Remove masking carefully to avoid peeling
- Do a final clean-up of the site
- Address any touch-ups before officially finishing the job

Best Practices Homeowners Should Expect from Exterior Painters in Omaha
If you’re hiring someone to handle exterior home painting, make sure they:
- Talk openly about how they’ll prevent overspray
- Use high-quality paints made for exterior use
- Know when to back brush or back roll
- Understand and measure the mil thickness
- Have the right tools for the job
- Adjust for Omaha’s weather and siding conditions
These are the things that separate a rushed paint job from one that actually lasts.
Exterior Painting in Omaha, NE
We walked through every major part of the process of exterior painting, from prepping the home and protecting against overspray to applying the right amount of paint and finishing with a final inspection. These are the details that help exterior painting in Omaha last for years without bubbling, peeling, or fading.
At Brush & Roll Painting, we’ve been helping homeowners like you since 1996. We’re happy to guide you, answer questions, and make sure you’re confident when choosing the right exterior painters in Omaha.
Click the button below to get a quote from a local expert who will treat your home with care.

If you’re starting to plan for your exterior painting project and want a better idea of what it might cost, try our easy-to-use exterior painting pricing calculator. It’s a helpful tool that gives you a ballpark estimate based on the size of your home, so you can plan ahead with more confidence. Click the button below to check it out and take one step closer to a fresh, professionally painted home.


-May-22-2026-01-56-32-9736-PM.png?width=800&height=418&name=Blog%20Post%20Image%20Size%20(1)-May-22-2026-01-56-32-9736-PM.png)


-May-15-2026-04-54-24-9954-PM.png?width=800&height=418&name=Blog%20Post%20Image%20Size%20(1)-May-15-2026-04-54-24-9954-PM.png)
-Sep-20-2024-01-43-26-0356-PM.png?width=800&height=418&name=Blog%20Post%20Image%20Size%20(2)-Sep-20-2024-01-43-26-0356-PM.png)


