Have you ever walked into your living room and felt something was a bit off? Maybe the space seemed dull or dated, but you couldn't quite put your finger on why? Often, it's not the big stuff - it's the details. Specifically, it might be your trim and doors. These overlooked pieces can make or break a room's entire vibe. But don't worry, that's where we come in.
Here at Brush & Roll Painting, we've been sprucing up Omaha homes for nearly 30 years. We've painted miles of trim and more doors than we can count. We've seen firsthand how a fresh coat of paint on trim and doors can totally transform a space.
In this article, we're going to walk you through our professional process for painting interior trim and doors. You'll get an insider's look at how the pros tackle this job, from prep to final touches. By the end, you'll be equipped to make informed decisions about your own home improvement projects.
How To Paint Interior Trim & Doors
Let's be real - painting trim and doors isn't the flashiest home improvement project out there. It's not as dramatic as a kitchen remodel or knocking down a wall. But here's a secret: it's these little details that can have a huge impact on your home's overall look and feel.
Think of your trim and doors as the frame for your home's artwork. Just like a beautiful painting can be elevated or diminished by its frame, your walls and flooring can be enhanced or detracted from by the condition of your trim and doors. A professional paint job on these elements can tie a room together, make spaces feel larger, and even highlight architectural features you didn't know you had.
So, let's dive into how a proper woodwork painting process is done.

Step 1: Prep For Painting Doors & Trim
In the painting world, we have a saying: "The job is 90% preparation, 10% painting." It might sound like an exaggeration, but it's pretty darn close to the truth. Proper prep is the foundation of a great paint job.
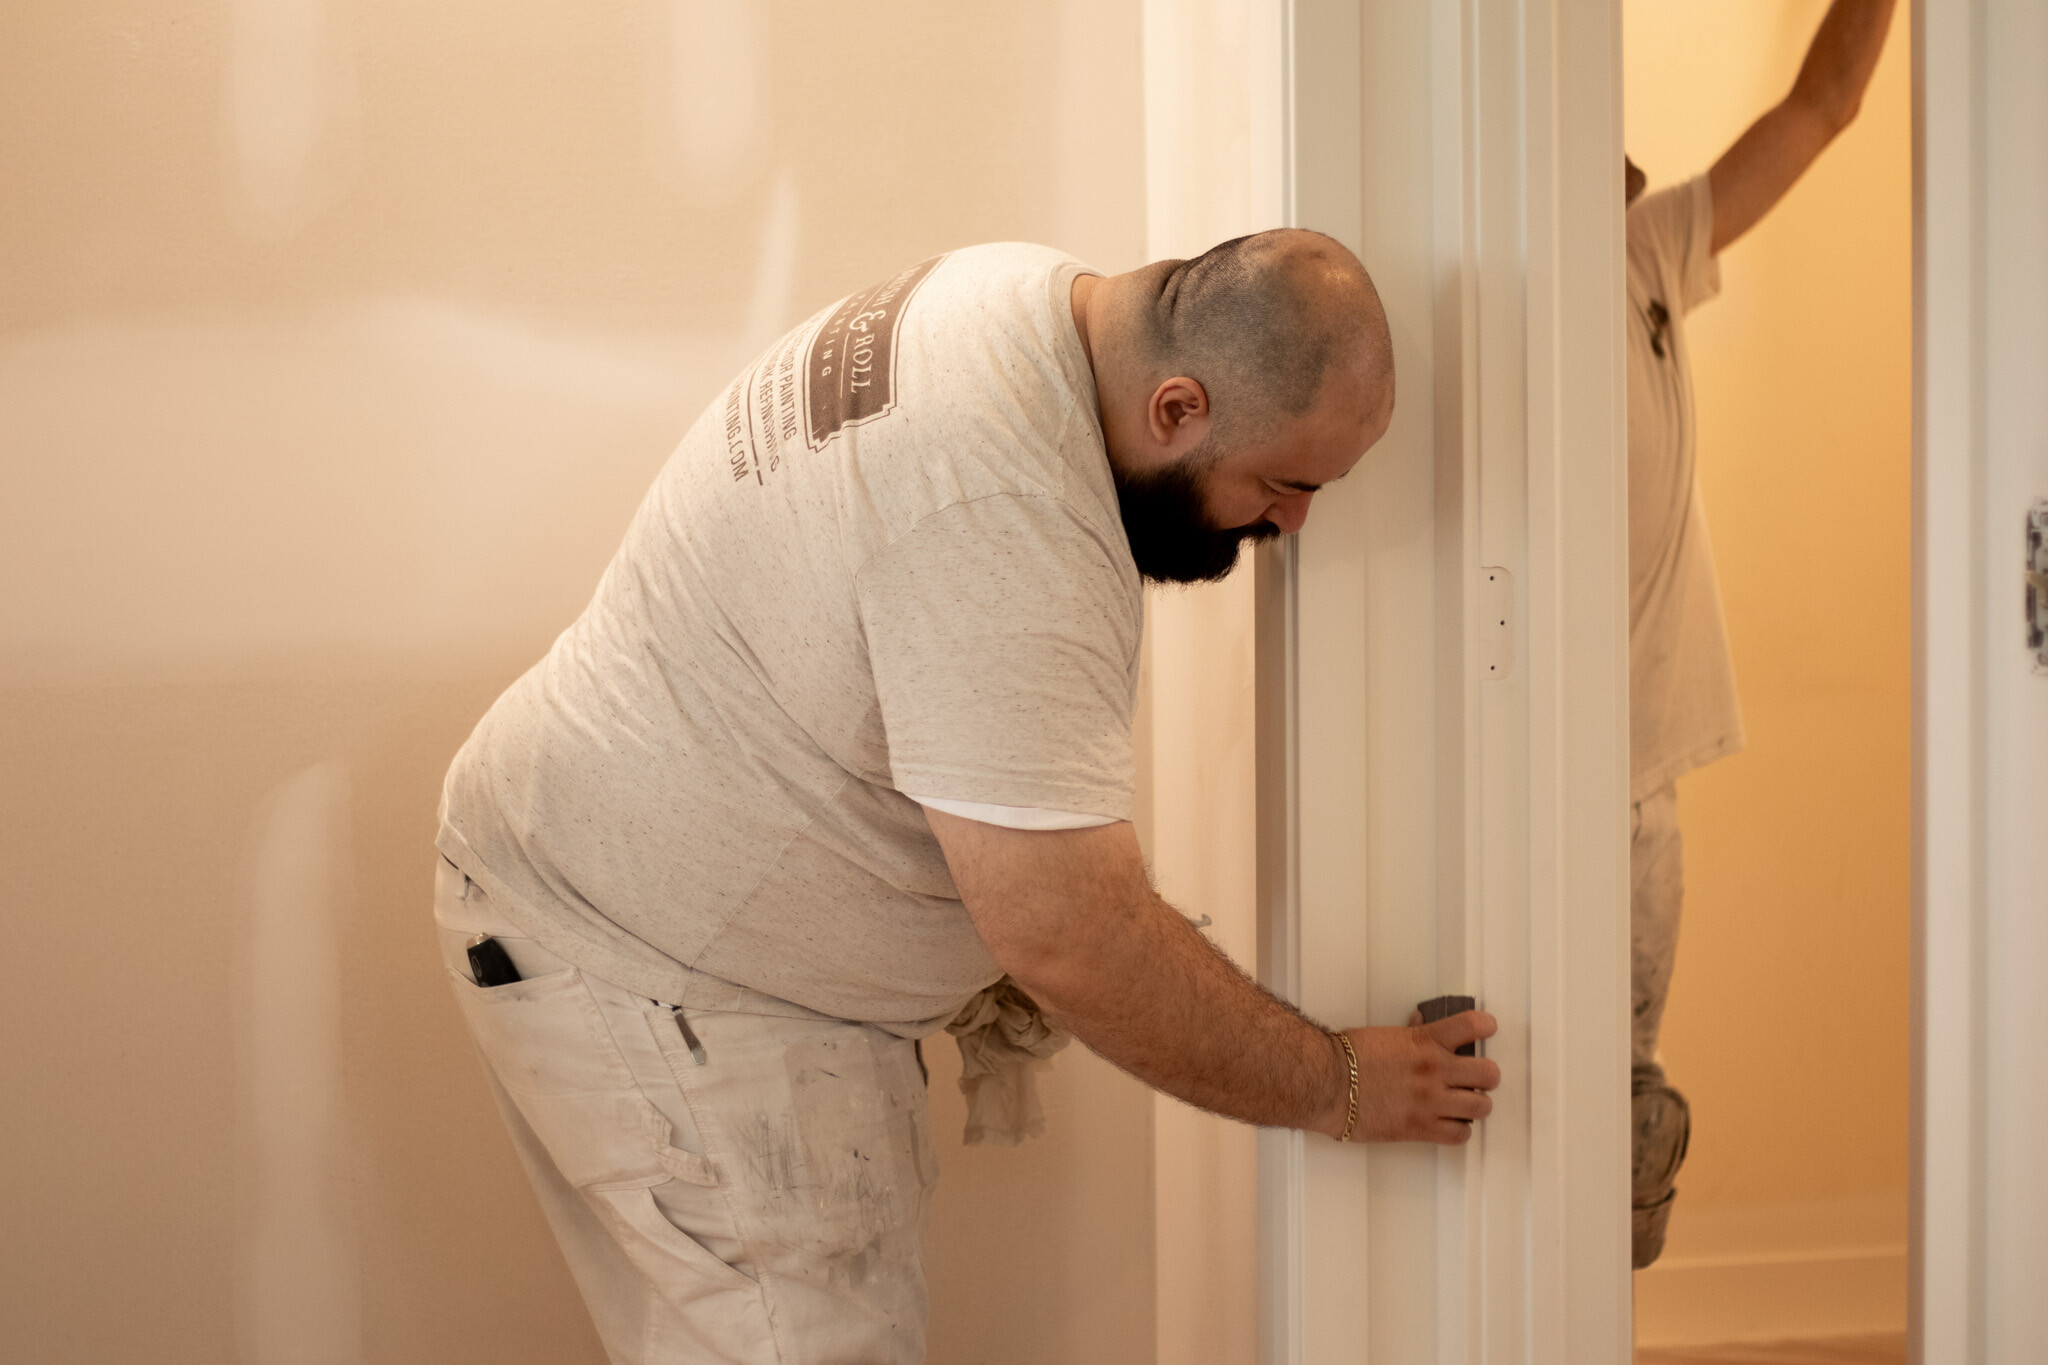
Remove Hardware from Doors & Trim
Doorknobs, hinges, decorative elements - they all come off. It's much easier to get a clean paint job without working around these obstacles.
Masking
Before beginning any woodwork painting project, proper masking is crucial to ensure clean lines and protect surrounding surfaces. Your painter should start by applying painter's tape along the edges of all surfaces adjacent to the trim or doors being painted, but which should remain paint-free. This creates a protective barrier on these edges.
For larger areas requiring protection, such as floors or furniture, use plastic sheeting or drop cloths. These should be secured with painter's tape to prevent paint from seeping underneath. When protecting walls next to trim, consider using wider masking paper in conjunction with painter's tape for more full coverage.
For intricate areas or detailed woodwork, painters should use narrower tape to achieve precise lines. Pressing down firmly along the edges of the tape to prevent paint bleed-through. Painter should remove the tape while the paint is still slightly wet to avoid peeling off dried paint.
When masking windows, your glass should be entirely covered with plastic sheeting or newspaper, leaving only the wooden frames exposed. For doors, painters will need to remove hardware like knobs and hinges if possible, or cover them thoroughly with tape.
Your painter should take extra care in high-moisture areas like bathrooms or kitchens, ensuring your masking materials adhere well to potentially damp surfaces.
By hiring a painter that will properly mask and protect surrounding areas, you'll save yourself considerable clean-up work and achieve a more professional-looking finish in your woodwork painting project.
De-glossing
This step is crucial for improving the adhesion of the topcoat, especially on interior woodwork. We use either sandpaper or a liquid deglosser to dull the surface. For previously unpainted or stained woodwork, we lightly sand to create a surface the new paint can really grip onto.
After deglossing, we tackle any stains. These are often caused by sap in the wood, and if left untreated, they can bleed through your new paint job. We seal these stains with an oil-based primer/sealer to ensure they stay hidden.
Repairs & Caulking
We use a high-quality siliconized acrylic latex caulk to fill in any cracks between pieces of wood. This not only gives a smoother, more professional look but also helps prevent drafts and moisture intrusion.
The baseboards in your home can easily get nicked or scuffed up, so it’s important that all of these repairs are taken care of before painting.
Step 2: Priming for Perfection
Priming is like laying a good foundation for a house. It might not be visible in the end, but it's essential for a quality result.
For most interior trim and doors, we use a high-quality bonding primer. This is especially important for previously unpainted or stained woodwork. The bonding primer creates a surface that the topcoat can adhere to effectively, ensuring a long-lasting finish.
For areas with stubborn stains that we sealed earlier, we make sure to use a stain-blocking primer. This extra step ensures that no discoloration will show through your beautiful new paint job.
We apply the primer with precision, using brushes for intricate trim work, making sure to back brush into the grain, and foam rollers for flat surfaces like doors. We make sure to get an even coat and let it dry completely before moving on to painting.

Step 3: Woodwork Painting with Precision
Now for the main event: painting. We always choose high-quality paints specifically designed for trim and doors. These are formulated to be more durable and resistant to chipping and yellowing over time.
Plus, they are stain resistant, making the surface easy to clean with soap and water.
When it comes to application, we take our time. We use long, smooth strokes and avoid overloading our brushes or rollers. This prevents drips and ensures even coverage.
After the paint is dry, we do a thorough inspection for any drips or imperfections. If needed, we'll do a light sanding with very fine-grit sandpaper to smooth out minor issues, followed by careful touch-ups.
Finally, we reattach all the hardware we removed at the beginning. We make sure everything is completely dry first - we wouldn't want to ruin your beautiful new paint job with fingerprints or smudges.
Should You Paint Your Woodwork?
Let's talk numbers for a moment. According to a 2019 study by the National Association of Realtors, interior painting projects, including trim and doors, can recover up to 107% of their cost at resale. That means not only does a fresh paint job make your home more enjoyable to live in, but it can also be a good investment if you’re planning on selling your home soon.
But beyond the numbers, there's something to be said for the psychological impact of a well-maintained home. Walking into rooms with crisp, clean trim, walls, and doors can increase your pride in your home.
It's like giving your house a facelift without the need for major renovations.

Should You Hire a Painter to Paint Your Doors or Trim?
Now, you might be wondering: why hire a professional for this job? Couldn't I do it myself? While DIY is always an option, there are several advantages to hiring a professional:
1. Amount of Labor: Typically, painting woodwork in a home is a large project. It can be very time consuming and tedious. Baseboards are small and takes a lot of prep for clean lines. If this amount of work seems like too big of a load for you, hiring a professional painter may be your best bet to save you time.
2. Expertise: Professional painters will have painted countless trim and doors. They know how to handle different types of wood, tricky corners, and unexpected issues that might pop up.
3. Quality tools and materials: We use professional-grade tools and materials that aren't always available to the average homeowner.
4. Attention to detail: From proper deglossing to expert caulking, we know the little steps that make a big difference.
5. Guaranteed results: If you're not happy with any aspect of our work, we'll make it right.
Painting Your Interior Doors and Trim
Remember that feeling of something being off in your room? By now, you should have a clear understanding of how a fresh coat of paint on your trim and doors can transform your living spaces. You've got an insider's look at how professionals tackle this job, from meticulous prep to final touches.
At Brush & Roll Painting, we've seen countless Omaha homes transformed by painting trim and doors. With the right prep work steps and a high-quality product, a well-executed woodwork painting project can enhance any style of home.
Painting your woodwork can be a major investment into your home, whether you are having 1 room painted or your whole house. It’s important that you are confident while hiring a painter that you are making the best decisions for your home.

Click the button below to download your ultimate guide to hiring a painter, so that you can be prepared to hire the right painter for your project.


-May-22-2026-01-56-32-9736-PM.png?width=800&height=418&name=Blog%20Post%20Image%20Size%20(1)-May-22-2026-01-56-32-9736-PM.png)


-May-15-2026-04-54-24-9954-PM.png?width=800&height=418&name=Blog%20Post%20Image%20Size%20(1)-May-15-2026-04-54-24-9954-PM.png)
-Sep-20-2024-01-43-26-0356-PM.png?width=800&height=418&name=Blog%20Post%20Image%20Size%20(2)-Sep-20-2024-01-43-26-0356-PM.png)


