When you have wood furniture, there are many things you can do to make sure it looks as good as possible. Varnishing wood furniture offers numerous advantages that enhance both the durability and aesthetic appeal of your pieces.
One of the primary benefits is the protective layer it provides, safeguarding the wood from scratches, stains, and moisture damage. This not only prolongs the life of the furniture but also maintains its natural beauty over time. Varnish enhances the wood's natural grain, bringing out its rich colors and textures. Additionally, varnished surfaces are much easier to clean and maintain, requiring only a simple wipe with a damp cloth.
At Brush & Roll Painting in Omaha, NE, we have been refinishing furniture since 1996. We have found a thorough process that works. Including detailed prep work and high-quality products.
In this article, we will go over 5 tricks that we have found for varnishing wood furniture. by reading this article, you will know the steps you need to take towards refinishing your wooden furniture in a way that you will love.
Varnishing Wood Furniture
1. Preparation Is Key
When you have wood furniture that will be varnished, you must prepare well in advance of your varnishing.
Part of this preparation comes in terms of protecting the area around the furniture that will be varnished.
You will need to do this because if you don't protect the area, you are in real danger of varnishing much more than just the furniture.
You will also need to make sure that your wooden furniture's surface is ready to be varnished. There is a common misconception that the varnish process will take care of any issues present on the surface, including blemishes and bumps.
Though it would be nice if varnish would clear up these issues, what it truly does is to accentuate it and make it clearer that they are there -- so if you have bumps on the surface of your wood, varnishing will make them more visible.
The thing you need to do to make sure that your wood furniture is free of these problems is to sand, sand, and sand some more until your furniture is free of bumps, blemishes, and any other issues of the sort.
2. Weather Or Not
When you are looking to varnish your wooden furniture outdoors, you need to make sure that the weather is suitable for such a thing.
For one, you do not want it to be either too hot or too cold -- if it's too hot, the varnish will not dry properly, and if it's too cold, it will be quite unpleasant to both you and the varnish.
If it is windy, you will find yourself with a varnish that does not dry correctly, as the wind will affect the varnish.
-Oct-02-2024-07-31-12-5371-PM.png?width=632&height=330&name=Blog%20Post%20Image%20Size%20(8)-Oct-02-2024-07-31-12-5371-PM.png)
3. Stir, Not Shake
When you need to mix your varnish, it is highly recommended to stir the can rather than shake it. Stirring the varnish ensures that all the components are evenly distributed throughout the liquid, providing a consistency that will lead to a smooth and even application on your furniture.
By stirring, you avoid the risk of inconsistencies in the varnish's texture, which can result in an uneven finish that detracts from the appearance of the wood.
On the other hand, shaking the varnish might seem like a quick way to mix it, but it introduces air bubbles into the liquid. These bubbles can be problematic as they create an uneven texture on the surface of the wood once the varnish is applied.
The presence of bubbles will require waiting for them to settle before you can begin the painting process, which could delay your project and compromise the final look. Even after settling, some bubbles may remain trapped, resulting in a pitted or flawed finish.

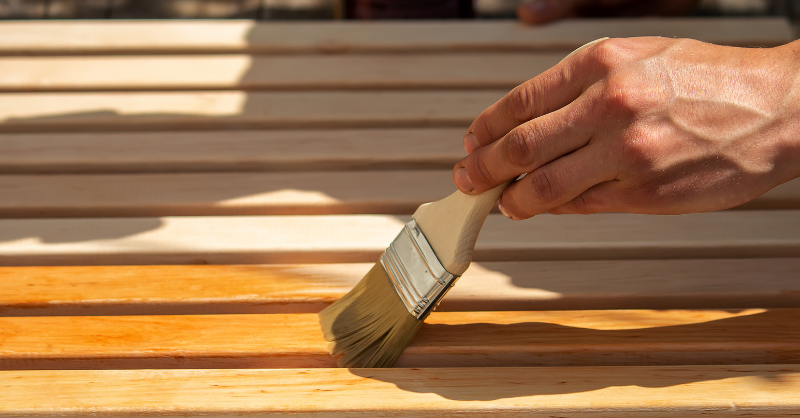
4. Better Brushes Varnish Better
You can't just get any varnish painting brush from anywhere and expect that you're going to get a quality job with it.
Instead, you will need to get a quality brush that is good for painting, preferably one that doesn't come from the dollar section from your local store, and that will bring out the best in your varnishing job.
It's also important that your brush be clean when you are looking to varnish, and especially that you do not use a brush that you have used for paint.
-Oct-02-2024-07-30-00-4633-PM.png?width=697&height=364&name=Blog%20Post%20Image%20Size%20(7)-Oct-02-2024-07-30-00-4633-PM.png)
5. Sand Between Coats
Though it may seem a bit unnecessary, it's a good practice to sand in between coats of varnish. This step might appear redundant, especially after you have already put in significant effort to prepare the wood surface initially, but it plays a crucial role in achieving a flawless finish.
Sanding between coats helps to remove any small imperfections, dust particles, or bubbles that might have settled on the surface while the varnish was drying.
The sanding shouldn't be something that you do thoroughly like when you are preparing the furniture but rather just a light sanding to ensure that your furniture's surface remains smooth enough to get your furniture looking good while varnishing it. Use a fine-grit sandpaper, such as 220-grit, to lightly sand the surface.
This gentle sanding will help the next coat of varnish adhere better, resulting in a more even and polished appearance. After sanding, be sure to wipe away any dust with a tack cloth to ensure a clean surface for the next coat of varnish.
Varnishing Your Wooden Furniture
From essential preparation steps to choosing the right conditions and tools, these tricks ensure that your refinishing project results in a professional-looking finish.
If you need a professional to help you with your furniture painting in Omaha, NE, our team at Brush & Roll Painting can help. For smaller objects, we use our climate controlled shop to prep and paint wooden furniture. Not only are we able to use all of our supplies and materials on hand and get the job done quicker, you don't have to worry about having painters in your home.
To get a quote for your painting project in the Omaha, NE area, click the button below.

Whether you're considering tackling your painting project alone or enlisting professional help, having the right guidance can make a world of difference. That's why we created the ultimate guide to hiring a painter. This guide is designed to help you navigate the process, ensuring you select a skilled professional who meets your needs and budget.
From understanding estimates to recognizing quality craftsmanship, our guide provides insights and tips that will empower you to make informed decisions. Download the guide today by clicking the button below and take the first step towards a beautifully painted space that you'll love.

Topics: