Thinking about updating your kitchen cabinets in Omaha, Nebraska? Giving your kitchen cabinets a quick DIY makeover is the easiest way of refreshing your cooking space. Kitchen cabinet refinishing is the best alternative to replacing your cabinets, which can be very expensive and time-consuming.
If your current cabinets are outdated but are still in good physical condition, you can quickly refresh their look with a few materials and a bit of elbow grease. However, if you’re new to woodwork refinishing, we will warn you, it can be a quite a laborious and challenging task.
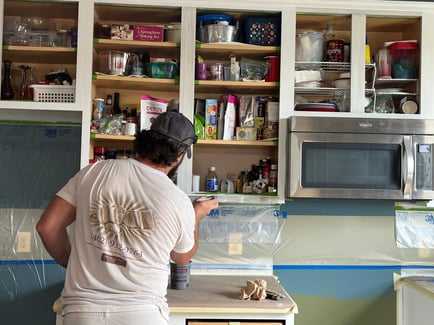
In fact, if you’re considering selling your home anytime soon, or are expecting super-quality results, you should consider hiring a cabinet refinishing expert for that final professional touch.
At Brush & Roll Painting in Omaha, NE, we are a premier cabinet painting company. With over 25 years of experience, we have gathered the ins and outs of cabinet and woodwork painting.
Having your cabinets painted by a professional can be an investment, so it might not be the best choice for you now. If you are confident in taking the DIY route, below is a step-by-step guide on how to go about it.
1. Label Every Cabinet Door and Drawer

After assembling all the necessary materials (paint, primer, paint brushes, rollers, paint buckets, drop cloths, painters’ tape etc.) label all your kitchen cabinets and drawers before you take them down. You can do this with a small piece of tape and a marker to write a number on the actual door and the cabinet boxes.
Preferably, you should draw a rough layout of your kitchen to make reassembling your cabinets easier. This might seem unnecessary, but if you fail to label, it can get quite confusing and very time-consuming to remember the right place for each piece when replacing them.
2. Remove Cabinet Doors and Drawers
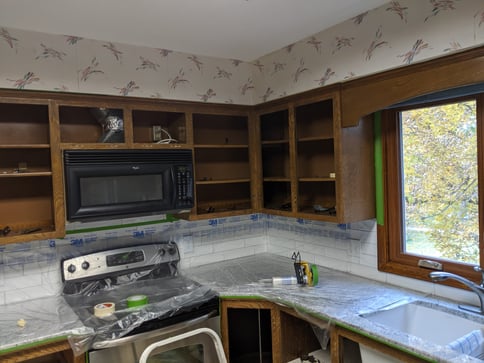
Carefully remove the doors and the drawers so as not to damage them. Based on their design, a simple screwdriver might help you remove the hinges. Be sure to remove the handles and hardware as well –you don’t want to mess them up with paint. It’s always best to install these back in the same place they came from, so you may want to number them for ease of identification.
Many DIY homeowners skip the process of removing doors and drawers. However, it is key for getting a smooth and even coverage.
3. Clean Your Cabinets

Once you’ve labeled and taken down everything, you need to give your cabinet doors, drawers, frames and boxes a good cleaning. Even if they look clean and unstained, you still need to wipe them thoroughly –accumulated grease can be invisible sometimes. Use a sponge or a clean cloth soaked in a degreaser to clean all the surfaces that will require painting.
4. Fill in Wood Gaps
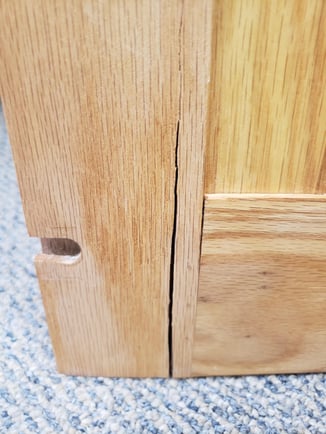
For a professional finish, it's crucial to pay attention to any gaps, holes, minor dents, or cracks in your cabinets. Applying a filler material not only smooths out imperfections but also ensures a seamless and polished look once the painting is complete. By taking the time to address these small details, you can elevate the overall appearance of your kitchen cabinets and achieve a truly stunning transformation. This will ensure the refinished cabinets look smooth and new.
5. Sand the Cabinets
This is probably the most difficult part. Once the filler material has dried completely, sand the cabinet doors, drawers and frames using medium grit sandpaper or a handheld electric sander, if you can get one.
Sanding removes debris and dirt and roughens the surface for easy adherence of the primer and paint. Sanding also smoothens out any raising parts that can make painting difficult. Once you’re done, wipe down everything again with a damp cloth.
6. Prime the Cabinet Surfaces
Before you open that paint can, you first need to prime all your surfaces. A good quality primer will create a suitable surface for paint to better adhere to. Additionally, applying a primer can help you cover up some stains and blemishes that could otherwise bleed through your paint. This crucial step sets the foundation for a flawless and long-lasting finish on your cabinets. It not only helps the paint adhere better but also ensures a smoother application and a more professional look overall.
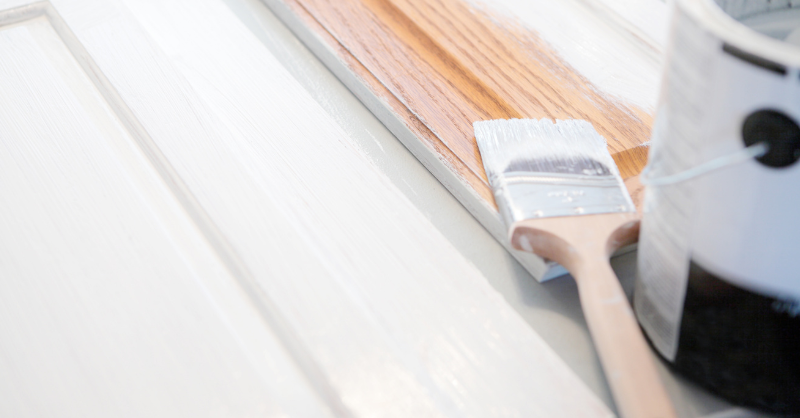
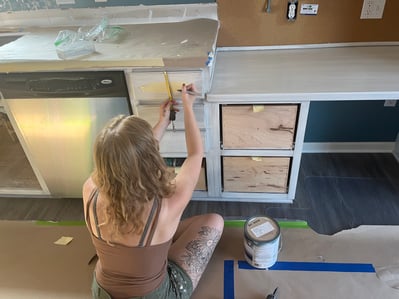
7. Painting Cabinets
Now here comes the fun part. Once the primer has dried completely, it’s now time to apply the paint. Typically when DIY cabinet painting, homeowners use a cabinet paint from a hardware store.
We recommend using a roller for flat wide surfaces such as cabinet door faces and then using a brush for small, sharp or grooved surfaces such as frames and door edges.
Take your time to cover every area and ensure the coat is even. If you need to apply a second or third coat for a finer finish, make sure that the first coat is completely dry and give it a light sanding before applying the second coat.
8. Reassemble Doors and Hardware
Once you’re satisfied with your paint job, allow enough time for the cabinets to completely dry before reassembling them. Consult your layout drawing or numbering to easily identify where each piece is supposed to go. If your handles and drawer pulls are rusty or dated, we recommend buying new ones for a complete new shiny look.
DIY Painting Your Kitchen Cabinets
Refinishing your kitchen cabinetry is a cost-effective process and can transform your cooking space at very little cost. Patience is very important on such a project –so take your time and don’t cut corners. If all these sounds intimidating, you should probably stick to hiring a professional painter to have it done for you.
Don't want to do it yourself? Schedule an estimate with us to see how we can refresh the look of your kitchen cabinets.
Topics:


-Mar-20-2026-03-16-05-8428-PM.png?width=800&height=418&name=Blog%20Post%20Image%20Size%20(2)-Mar-20-2026-03-16-05-8428-PM.png)


